Learning how to build and edit your menu is one of the most important features in the Lavu Control Panel. This article will take through how to build your menu from scratch, but you can use the information here to help edit an existing menu.
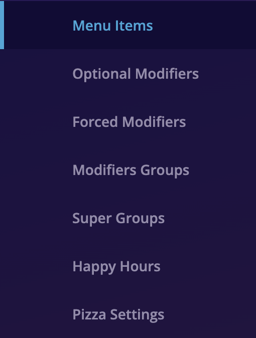
Everything we will be working with is contained within the pages under Menu on the left hand side of the Control Panel.
Menu Groups
All menus start with Menu Groups. These are the top of your menu hierarchy, which contain all of your menu categories and their items.
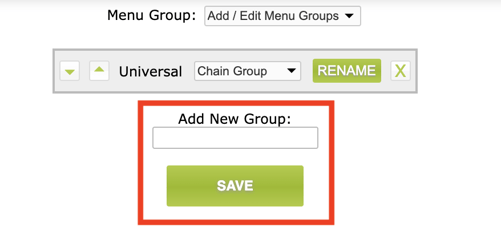
To create a menu group, click the drop down at the top of your screen, and click on Add/Edit Menu Group.
Here you are able to create a new menu group by providing a name, and clicking Save.
Once you have menu groups created, you will be able to select them from that same dropdown we used earlier.
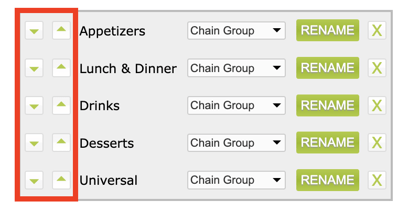
While on this page, you can click the arrows on the left hand side to reorder your menu groups.
Note: The dropdown option for Chain Group will only be available if you have multiple accounts linked together in Lavu. They assist with reporting across multiple restaurants, but will have no affect on your menu building.
Menu Categories
The next step in building a menu is to fill your menu groups with Menu Categories. To start, select the menu group you wish to add a category from the drop down.
To add a new category, simply click the Add Category button.
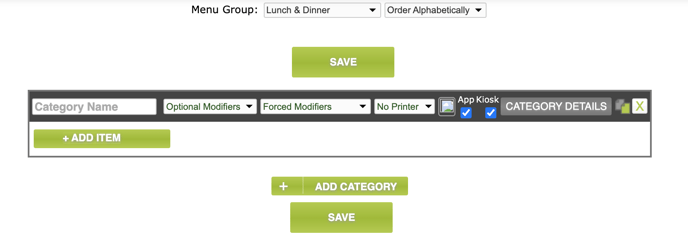
Provide a name to the category and that is all that is required. You can add as many categories to your group as you need.
Organizing Categories
If you look to the right of the dropdown next to Menu Group, you will see another dropdown that says Order Alphabetically. This tells us that as you create categories and items, they will automatically be sorted alphabetically.
If you would like more control over how your menu is organized, you can change this dropdown to Order Manually.

We will see later how to reorganize menu items, but menu categories are a bit different.
When manually organizing your categories, they will be sorted in the order that they were created. If you wish to change their order, you will want to change a setting in Category Details.
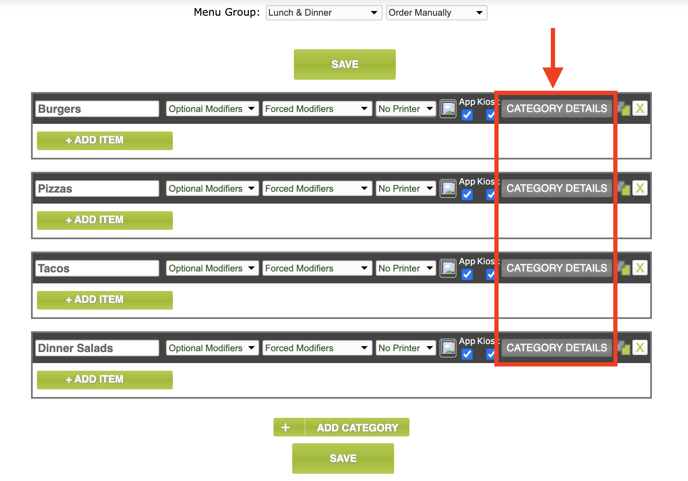
Click on the gray Category Details button for the category you wish to edit. Then locate the setting labeled Display Order.
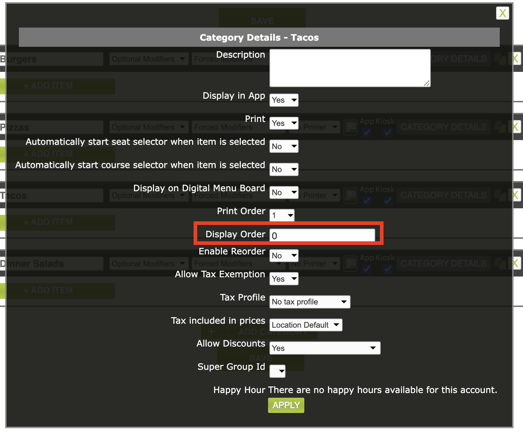
By default this setting is set to 0, meaning it will display first amongst all of your categories. To reorganize your categories, simply change the number for each category to your desired order, starting from either 0 or 1.
Menu Items
Once you have categories created, you can add items to them by clicking the green Add Item button within each category.

The only thing required for a menu item is to provide a name. If you leave the field for price blank, the item will default to $0.00.
Reordering Menu Items
Once you have menu items created, you can reorganize them (if you have Order Manually selected at the top of the page) using the arrows on the left.
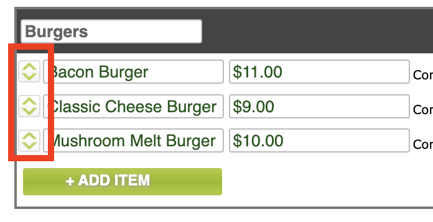
Simply click and drag the arrow icon and drop the item where you would like it to appear in your menu category.
Note: If you do not see these arrows, please save your menu first, and also check to make sure Order Manually is selected from the dropdown at the top of the screen.
Forced Modifiers
Forced modifiers are a way you can prompt your servers to collect additional information from the customer. These should be used for information that is required for the kitchen staff to prepare the menu item.
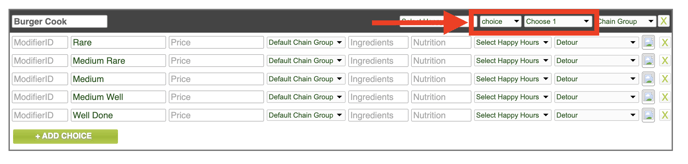
In my example above, a good example for a Burgers category, is to ask how the customer would like their burger cooked.
I'll start by navigating to the Forced Modifiers page on the left, and clicking Add Mod List.
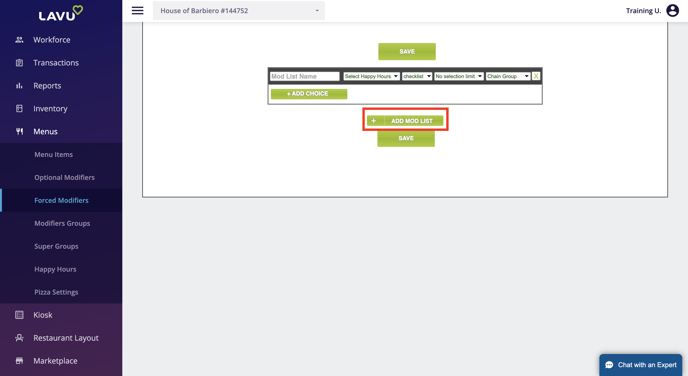
Now I would give the modifier list a name, and add my choices that the customer can pick from. For this particular example, I'm also going to make sure that it is a Choice forced modifier, since I wouldn't want my customer to pick multiple options from this list.
Don't forget to click Save.
Now to attach my new forced modifier to my menu items, I'm going to navigate back to my Burgers category and attach the modifier to it.

This is an example of attaching a modifier at the category level. Doing this allows this modifier to apply to all menu items in the category, even items I add later.
Note: If you add a modifier to the category level, and then attach another modifier to a specific menu item, that item will only read from the modifier you attached to it. In other words, a modifier attached to the item will overwrite any modifier attached to the category.
To attach multiple modifiers to an item or category, you should use Modifier Groups.
Optional Modifiers
Optional modifiers work in a very similar way to forced modifiers. However, this information should be reserved for customer requests, or modifications to a menu item that are not required for an item to be made in the kitchen.
For my burger example above, a good example would be substitutions. If someone wants a burger without lettuce, my servers can easily input this into the order using Optional Modifiers.
I'll start by navigating to the Optional Modifiers page on the left, and clicking Add Mod List.
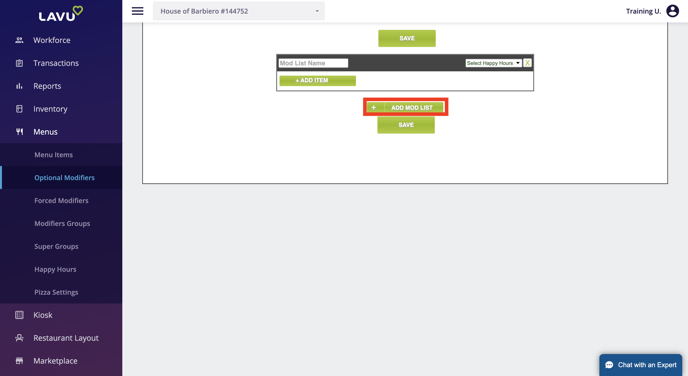
There are less options here than with forced modifiers, but creating them remains the same. I'll give the modifier list a name, and start adding choices that my servers can pick from on the POS.
Don't forget to click Save.
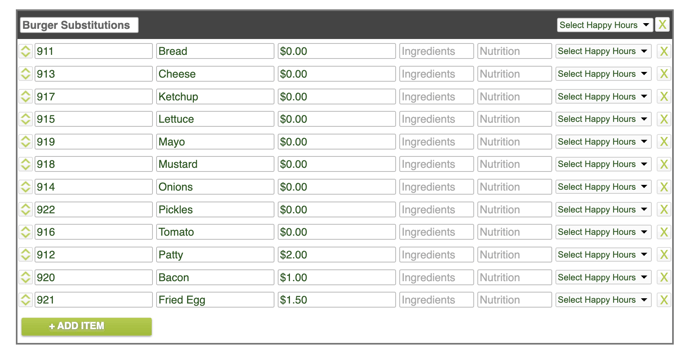
In my example above, I have added an up-charge for requesting an extra patty, bacon, or fried egg.
Just like with forced modifiers, the final step is to add this optional modifier to my category in my menu. Also just like my forced modifier example, I'm applying it to the category, so that it applies to all my menu items, even ones I make in the future.

There are other more advanced features in menu building like Modifier Groups, Detours, Combo Builders, and more that you can read about in other articles on our support site.