This article helps how to make the connection between the Verifone card reader and your WiFi network.
Before getting into the network connection process, refer to the following image for a quick reference of the Verifone e285 card reader.
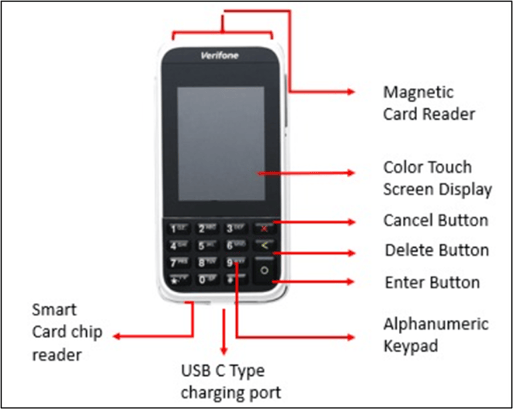
Turn ON the card reader by holding the long press of the Enter button (denoted by the Green Circle). The card reader get boots up, and the Verifone screen will appear.
When the card reader boots up, no internet connection is found, and the reader displays the IP Setup options.
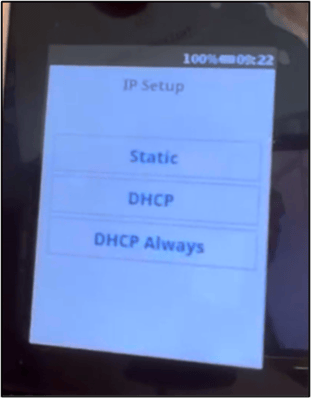
Note: Please ignore the IP Setup options if you’re trying to connect the device to your WiFi network.
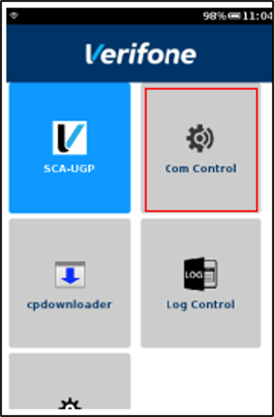
Press the numbers 1, 5 & 9 together on the Verifone card reader keyboard to open the settings screen.

Once the settings screen gets opened, click on “Com Control.”
After that, you will arrive on the Communication Panel screen and click on the More option.
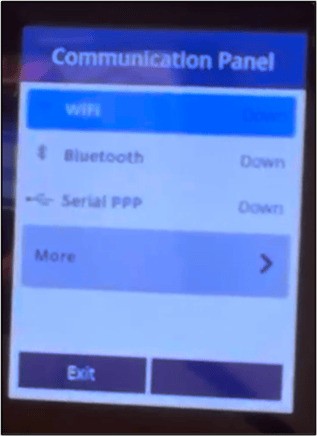
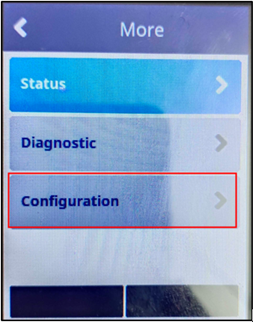
Under More, you will find three options (Status, Diagnostic & Configuration), and then click on Configuration and enter the password 200331.
Note: The customer success team will get the password from Verifone.
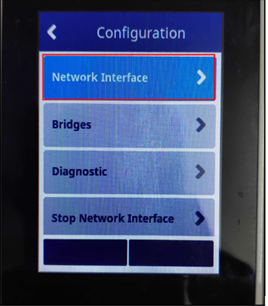
Select the Network Interface option under the Configuration screen.
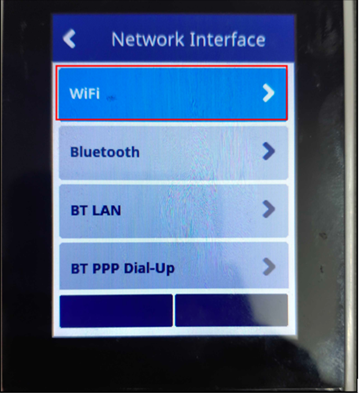
Select the WiFi option under Network Interface to scan for available WiFi networks.
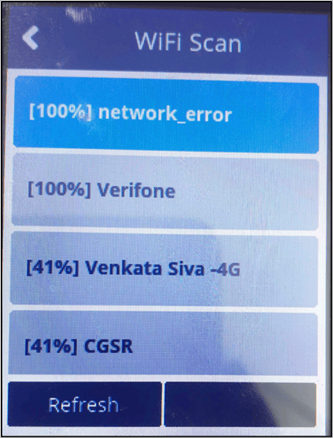
Select the appropriate WiFi network and click on the Add button.

Then click on the Pre-Shared-Key (PSK), provide the correct WiFi password, and click on the Save button.
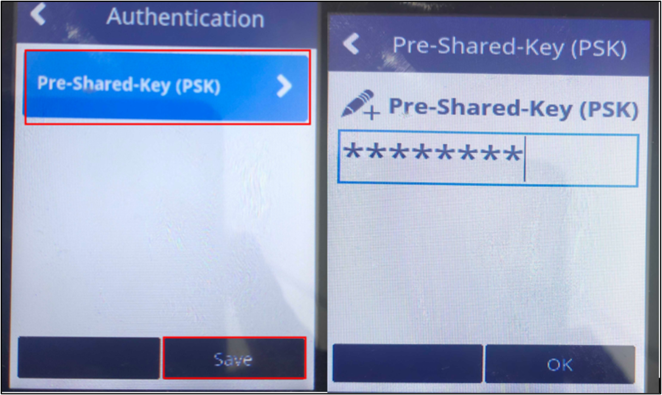
After saving the details, click on the Ok button, and then it asks for “Apply settings on interface?” click Yes.

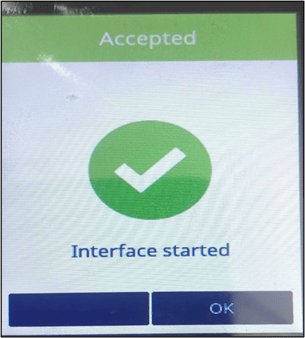
After clicking on Yes, a success message appears, and click on the OK button. Once the connection is made, navigate to the Communication Panel by connecting the Wifi.
Note: Ensure that POS-App(iPad) and Verifone card reader must be connected to the same WiFi network. Otherwise, the communication between the devices will get failed.
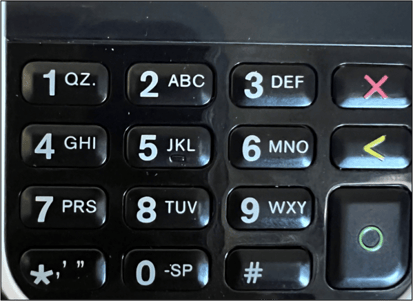
Keypad Instructions
Typing with the Verifone e285 keypad is easy, and below are some instructions on how to use the keypad. These instructions may be helpful for you while entering a password when you’re pairing the device with your network.
- Press a key repeatedly until the letter is shown.
- To enter a space, press the ‘0’ key.
- To enter a special character or punctuation mark, press the ‘*’ key.
- To switch between character cases, press the ‘#’ key repeatedly.
- To type in a number, press and hold a number key.
- To cancel, press the ‘X’ key.
- To delete the text, press the ‘<’ key.