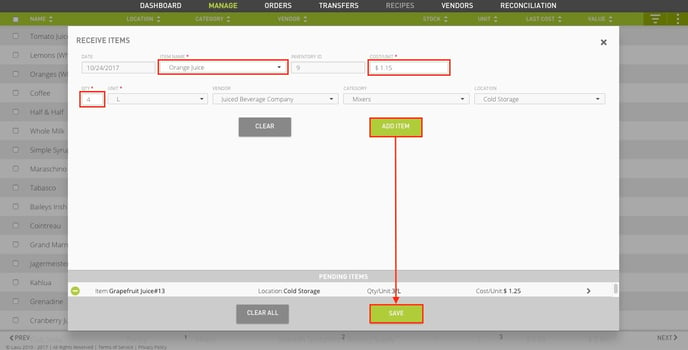
Inventory Manage Tab
A short article detailing the features and tools in the Manage Tab in Inventory.
The Manage page houses all ingredients in the Inventory system. You can create individual items, view an item’s details, organize the list of current stock, waste and receive items, or mass import/export ingredients from/to an external repository all in one place.
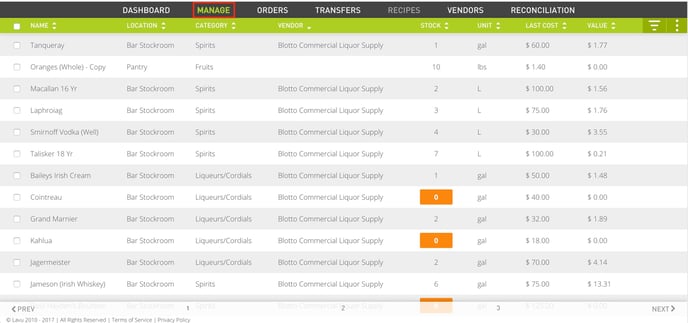
Item Details
Item details can be accessed by clicking on an inventory item to view additional information about the item, as well as make changes to the Item Name, Primary Vendor, 86 Count, Low Stock Alert, Category, Location, BIN, Serial Number, SKU, and Purchase/Sales Unit(s).
Additionally, the Item Details view displays menu items associated with the inventory item. Clicking on the associated menu item will link users to the respective menu group.
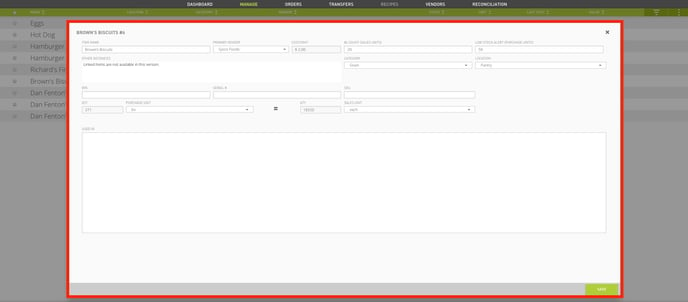
Options for Viewing and Filtering Inventory Items
By default, the inventory items will be listed in the order they were added to the system.
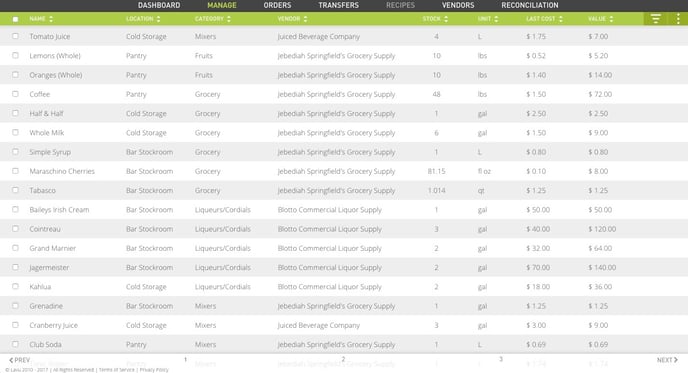
Column headers can be used to regroup inventory items in ascending or descending order by Name, Location, Category, Vendor, Stock, Unit, Last Cost, or Value. Clicking on a column heading once will group items in ascending order.
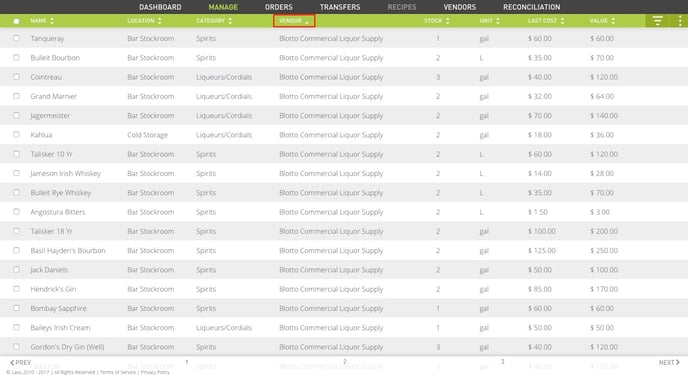
Clicking the same column heading a second time will group items in descending order.
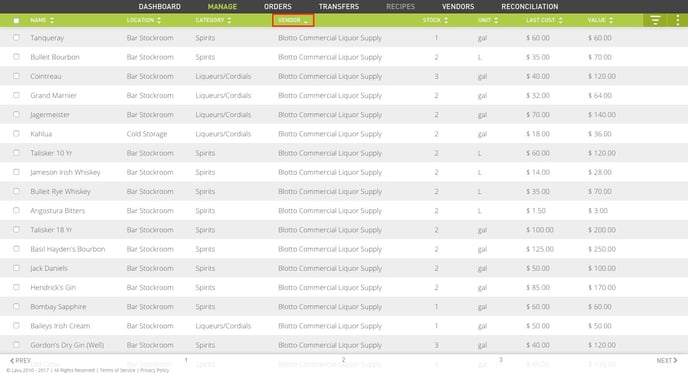
Depending on whether the column refers to a letter or number field, items will be grouped alphabetically or by numeric value.
Filter Options
In addition to regrouping items by column header, the Filter button can be used to confine the visible list of items according to one of several filtration options.
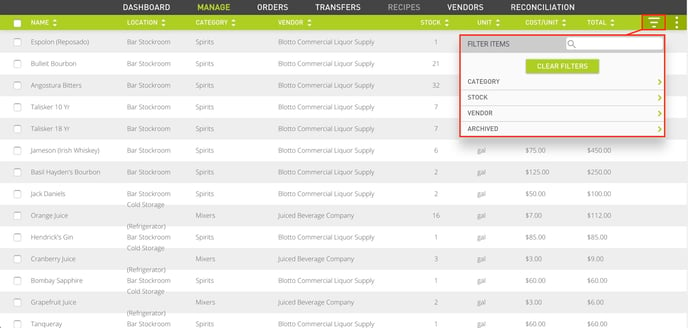
Use the Filter popup to search by item name, or choose from one of the preset filters including:
- Category
- Stock
- Vendor
- Archived
Items Filtered by Category

Items Filtered by Vendor

Action Menu
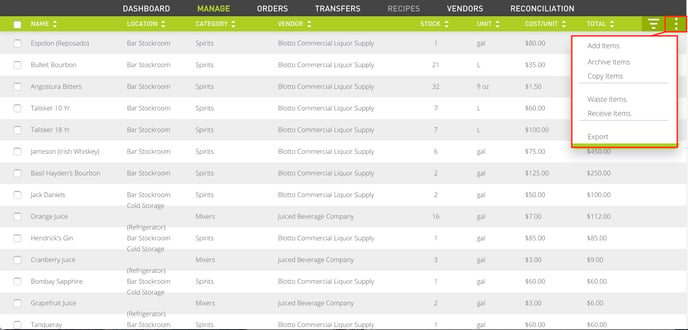
The Manage tab Action Menu houses several functions vital to creating and maintaining inventory:
- Add Item(s) - Create one or more new items to be tracked in the inventory system.
- Archive Item(s) - Move discontinued or otherwise obsolete items to the archived list of ingredients.
- Copy Item(s) - Create a copy of one or more inventory items.
- Waste Item(s) - Remove a quantity of an item (or items) from the available stock due to spoilage, damage, or other non-sale waste reasons as defined in Inventory Settings .
- Receive Item(s) - Receive additional stock of an existing item (or items) that was not obtained as the result of a Purchase Order.
- Import/Export - Import a large set of ingredients or export existing inventory items en masse via .csv form. More information available in Inventory Import and Export .
Add Items
Selecting Add Items will generate a window in the center of the screen from which new items may be created. Minimum required fields for item creation are Item Name, Cost per Unit, Category, Storage Location, Purchase Quantity/Unit, and Sales Unit.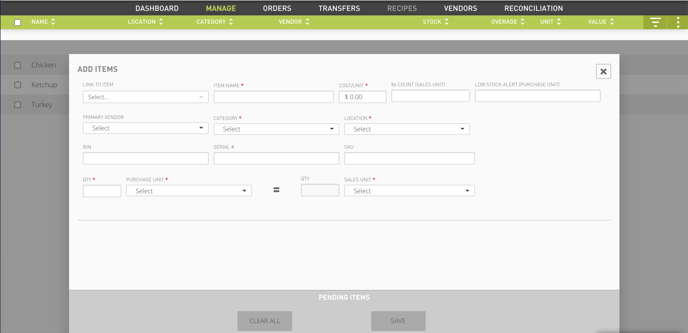
After entering values for all relevant fields, click Add Item to place the ingredient in the “Pending Item” queue near the bottom of the window.
Note: You may need to scroll down in order to see the Add Item button.
When all new items have been entered, click SAVE to add the pending item(s) to inventory.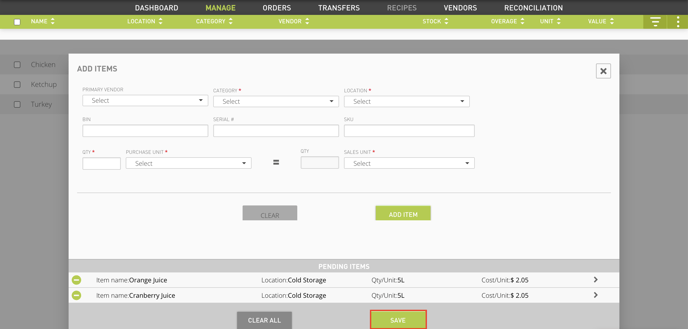
Waste Items
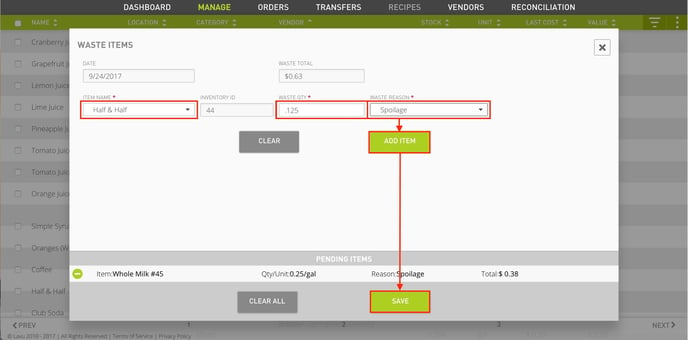
Choosing Waste Items from the Action Menu permits users to decrement the available stock of an item. Required fields for accurate waste management are Item Name, Waste Quantity, and Waste Reason (Inventory ID, Waste Total, and Unit are assumed by the system).
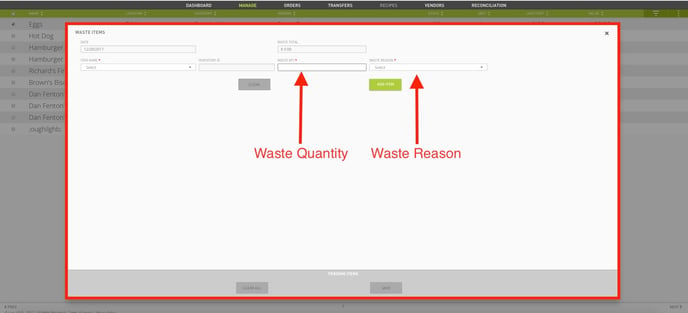
As with creating new ingredients, users must enter a value for all required fields, add waste items to the “Pending Item” queue, then click SAVE to apply changes.
Receive Items
Select Receive Items to add new stock to an existing inventory item directly from the Manage area (as opposed to through a Purchase Order drawn from a Vendor). Required fields for reception of new inventory are Item Name, Cost per Unit, Quantity (to receive), and Unit of Purchase.
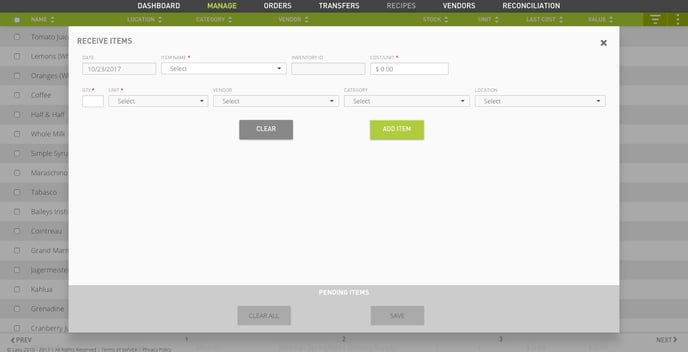
Enter/Select a value for all required fields, add items to-be-received to the “Pending Item” queue, then click SAVE to apply changes.
