Menu Building in Menu Drive
This article is for customers who will be building their menu in Menu Drive. If you are using the Lavu POS integration with Menu Drive, you do not need to follow this article.Reach out to our support team at 833-381-5288, or support@lavu.com for assistance with connecting your Lavu menu to your Menu Drive storefront.
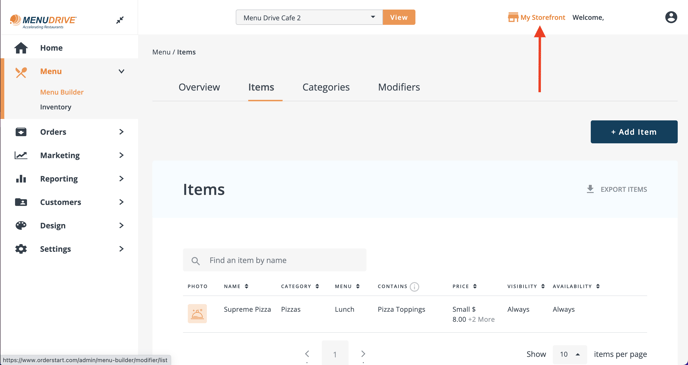
Menu Drive's menu building is designed around an "Item First" approach. From the Items page, you are able to create items, menus, categories, and modifier groups. The only thing you can't do from that page is add options to those modifier groups.
This article will review each tab and page in Menu Builder individually.

Overview
The Overview page allows you to create new menus, menu items, rearrange the order of your menus, and more. With an empty menu, simply click the white Create Menu button to get started.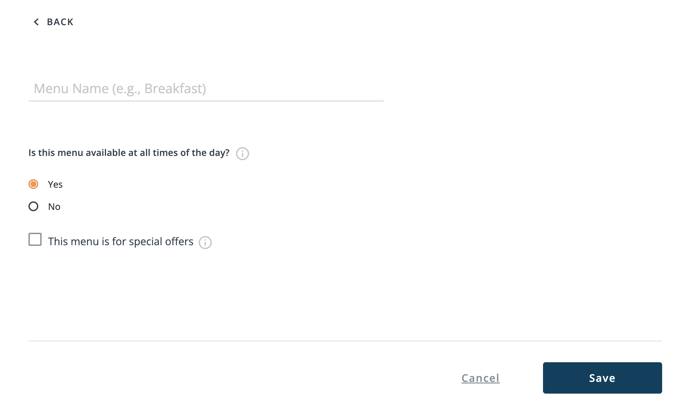
Creating a menu can be as simple as giving the menu a name, and clicking Save. Common examples of menus are dinner, lunch, and entrees. How you organize your menu is completley up to you.
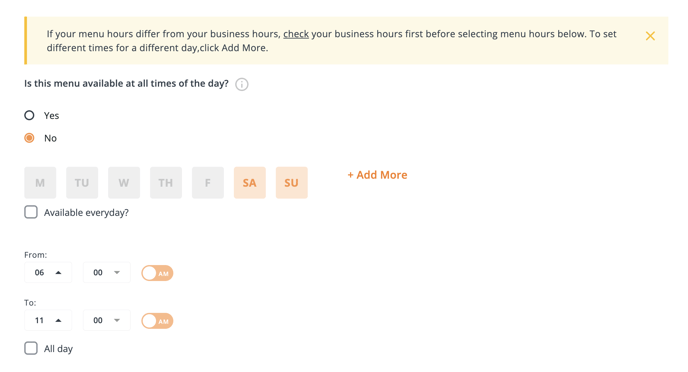
If you have a menu like Breakfast or Brunch that is only available during certain times of day, you can select No under Is this menu available at all times of day?, and set days and times that your customers are able to order items from this menu.
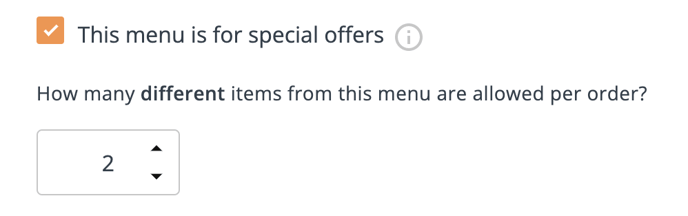
Special offers allow you to limit how many items from that menu can be ordered per customer.
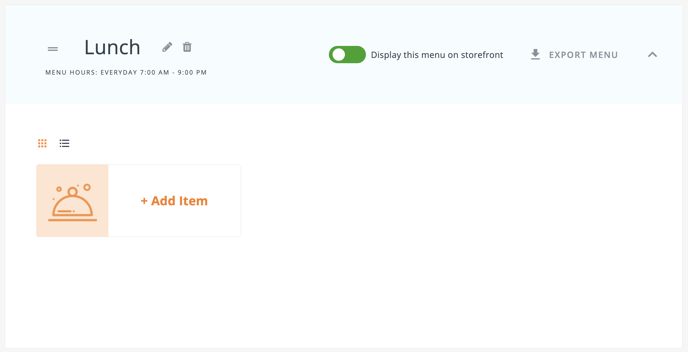
Once a menu has been created, you will be able to make changes to it on the Overview page. This includes changing the name of the menu, hours of availability, and adding menu items. You can also choose to disable a menu using the slider on the right. This will hide the menu from your customers on your storefront.
If you have a menu like Breakfast or Brunch that is only available during certain times of day, you can select No under Is this menu available at all times of day?, and set days and times that your customers are able to order items from this menu.
Special offers allow you to limit how many items from that menu can be ordered per customer.
Once a menu has been created, you will be able to make changes to it on the Overview page. This includes changing the name of the menu, hours of availability, and adding menu items. You can also choose to disable a menu using the slider on the right. This will hide the menu from your customers on your storefront.
Categories
Once Menus have been created, you can now fill them with categories. This allows you to break up your menu into multiple sections so that your storefront is easier to use for your customers. The types and number of categories you create will depend on your menu.
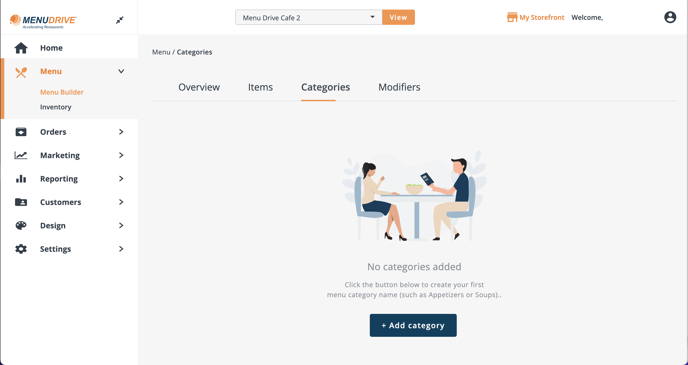
Click the blue Create Category button to get started. The only settings required to creating a category is a name, and a menu.
Note: Categories can be attached to multiple menus, but are commonly one attached to one.
Sizes can be used to give items like pizzas and drinks a built in selection (or modifier). Sizes are applied to every item within your category, so think carefully about how to organize your menu items into categories, so that your sizes make sense.
If you are making a category that doesn't need sizes (or you simply don't want to use them), you can leave the default selection at one, and the name of the size blank.
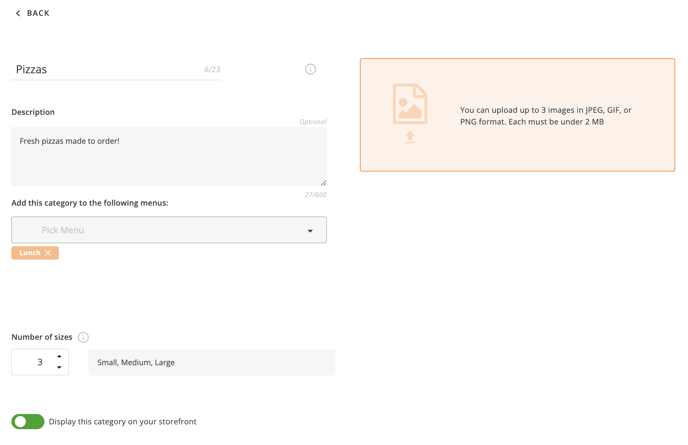
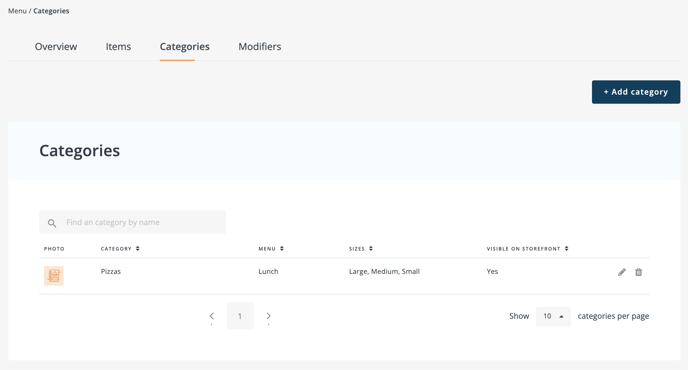
Click Save to create your new category. With a category in your menu, you will be able to make edits to it at any time by clicking on the pencil icon on the far right side of the screen.
Click the blue Create Category button to get started. The only settings required to creating a category is a name, and a menu.
Note: Categories can be attached to multiple menus, but are commonly one attached to one.
Sizes can be used to give items like pizzas and drinks a built in selection (or modifier). Sizes are applied to every item within your category, so think carefully about how to organize your menu items into categories, so that your sizes make sense.
If you are making a category that doesn't need sizes (or you simply don't want to use them), you can leave the default selection at one, and the name of the size blank.
Click Save to create your new category. With a category in your menu, you will be able to make edits to it at any time by clicking on the pencil icon on the far right side of the screen.
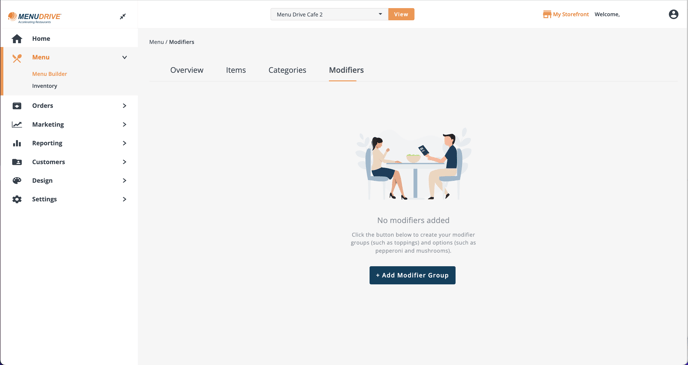
Modifier Groups
Modifiers allows you to create selections for your menu items. These can be things like flavors, salad dressing, cooking temperature for steaks, etc. Click the blue Create Modifier Group button to begin.
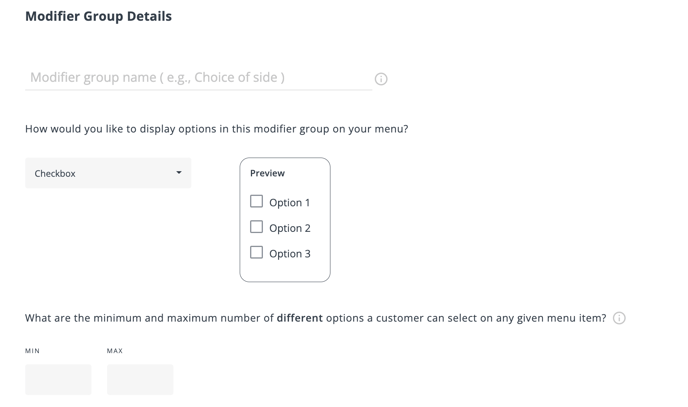
Creating modifier groups simply requires you to give the group a name, and set the type of selection your customers will see.
The different styles of modifiers are:
Creating modifier groups simply requires you to give the group a name, and set the type of selection your customers will see.
The different styles of modifiers are:
- Checkbox
- Radio
- Dropdown
- Quantity
- Toppings Matrix
Which one you use depends on the modifiers you will be creating. Options like drink sizes or cooking temperature for a steak can be a Radio button, or a Dropdown menu. Options like flavors could use the Checkbox or Quantity. Modifiers for selections like pizza toppings that require half options, extra, and light, the Toppings Matrix style should be used.
An optional setting you can choose to set are the Min and Max settings, which determine how many or how few options a customer must select before adding the item to their order.
Modifers
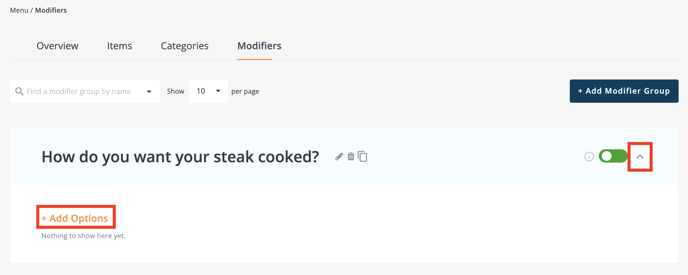
To add modifiers to your newly created group, click on the dropdown arrow on the far right, and click Add Options.
When creating options, you simply need to provide a name and a price, even if the price is $0.00. The option for Nested Modifier allows you to attach another modifier group to that specific option. Think about a modifier group of Burger Sides, and if a customer selects the House Salad option, you may also want to know which salad dressing they want.
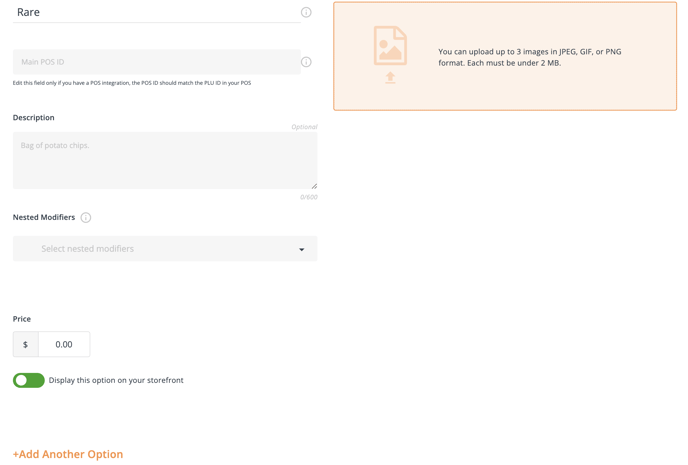
Note: You will not need to worry about settings like POS ID. This is only used if you are integrated with Lavu POS.
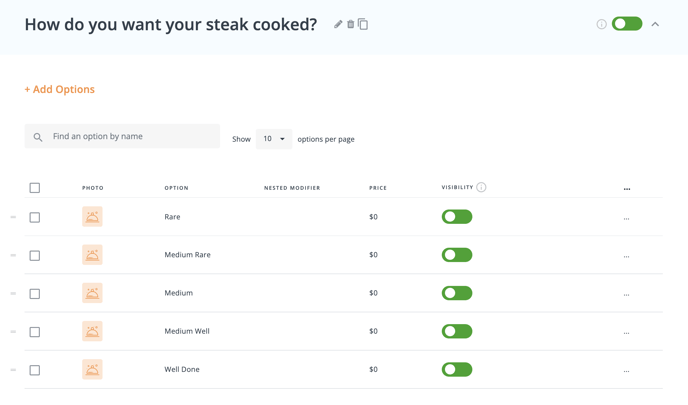
To add multiple options at once, you can click the Add Another Option button. Click the blue Save button at the bottom of the screen when you are finished.
Newly created modifiers can be edited by clicking the three dot icons on the far right and clicking edit.
When creating options, you simply need to provide a name and a price, even if the price is $0.00. The option for Nested Modifier allows you to attach another modifier group to that specific option. Think about a modifier group of Burger Sides, and if a customer selects the House Salad option, you may also want to know which salad dressing they want.
Note: You will not need to worry about settings like POS ID. This is only used if you are integrated with Lavu POS.
To add multiple options at once, you can click the Add Another Option button. Click the blue Save button at the bottom of the screen when you are finished.
Newly created modifiers can be edited by clicking the three dot icons on the far right and clicking edit.
Special Toppings Options
If you are adding options to a toppings matrix modifier group, you will have access to Advanced Settings.
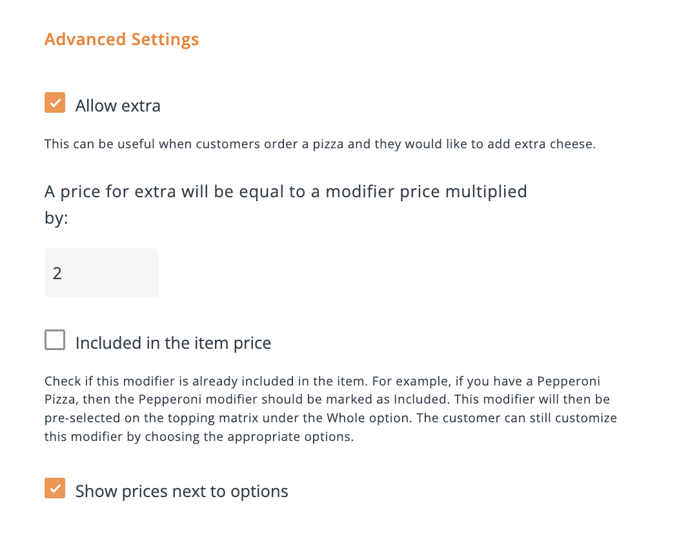
These advanced settings allow you to control features specific to modifiers like Pizza or Sandwich Toppings.
These advanced settings allow you to control features specific to modifiers like Pizza or Sandwich Toppings.
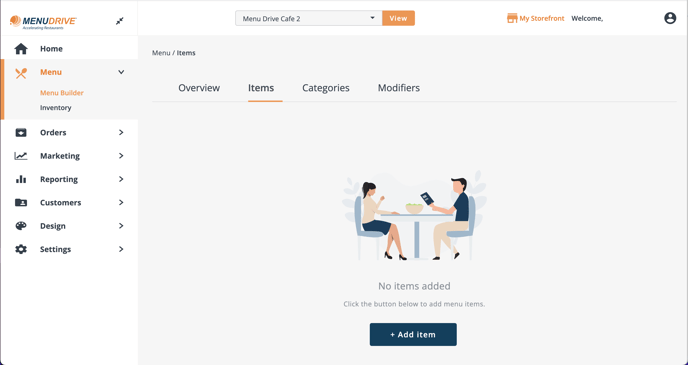
Creating Items
Finally we come to creating items, where we combine everything we have worked on from the previous sections. Keep in mind that you can create items from either the Overview tab, or the Items tab.
Click the blue Add Item button to begin.
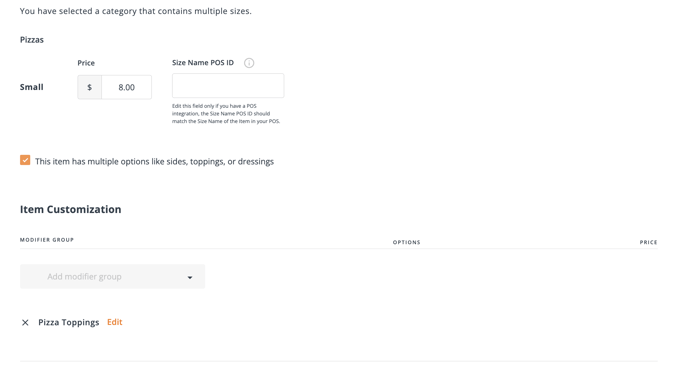
When creating an item, you will need to provide a Name, a Menu, a Category, and a price for each size. Everything else is completley optional.
Note: While uncommon, menu items can belong to multiple menus, and to multiple categories in those menus.
When adding prices, you will need to add a price to each size in your selected categories. Each size will also have its own section for attaching modifiers. That way, different sizes can have different modifiers attached to it. Simply check the box This item has multiple options like sides, toppings, or dressings, and select the modifier group from the dropdown menu. You can attach as many modifier groups as you need.
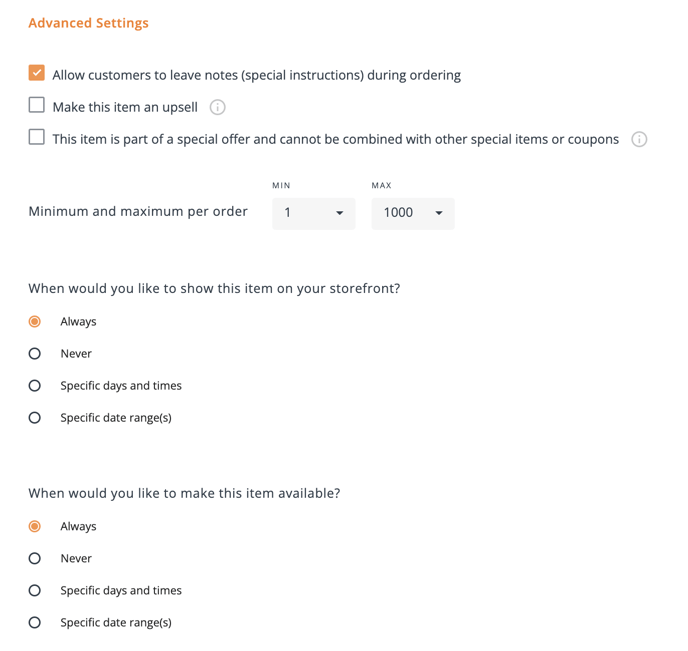
Advanced settings are available to help further customize your menu items. These settings can control when the specific item is available, how much a single customer can add to an order, and more.
Make this item an upsell is great for items like desserts. This causes a pop up to appear when your customer tries to checkout.
Click the blue Add Item button to begin.
When creating an item, you will need to provide a Name, a Menu, a Category, and a price for each size. Everything else is completley optional.
Note: While uncommon, menu items can belong to multiple menus, and to multiple categories in those menus.
When adding prices, you will need to add a price to each size in your selected categories. Each size will also have its own section for attaching modifiers. That way, different sizes can have different modifiers attached to it. Simply check the box This item has multiple options like sides, toppings, or dressings, and select the modifier group from the dropdown menu. You can attach as many modifier groups as you need.
Advanced settings are available to help further customize your menu items. These settings can control when the specific item is available, how much a single customer can add to an order, and more.
Make this item an upsell is great for items like desserts. This causes a pop up to appear when your customer tries to checkout.
Click the blue save button at the bottom when you are finished.
Be sure to checkout your newly created items by viewing your storefront.
For any further support, please reach out to our 24/7 customer support team at 505-535-5288 or email support@lavu.com.