A QR-based ordering system enables your customers to view your online menu, place orders directly to your kitchen, and pay for their meal right from their smart phone.
Advantages:
- Contactless Dine-in ordering.
- Serve more customers with faster services.
- Enhanced customer safety with minimal interaction.
- Decreases waiting time for a dine-in order via staff and increases customer satisfaction.
- We can save time bringing the menus to tables and collecting them.
- It is a paperless solution for menu cards at your restaurant.
- It gives an enhanced ordering and easy payment experience to the patrons.
Enabling QR Codes
The features for QR codes will be enabled by our customer success team. One of the bigger additions will be an additional location added to your account. This additional location will be used exclusively for your customers to place orders through your QR codes.
This must be done because certain settings are required for QR codes that may conflict with your already established online storefront.
These settings include:
- Specific Store Hours
- Specific prep times
- Dine-In only option for ordering
- ASAP orders only (no advanced ordering)
- No requirements for creating accounts when ordering
The customer success team will copy your menu over from your original Menu Drive account to this new QR code account. Other aspects like loyalty, discounts, and email automation can be also copied over at your request.
Creating QR Codes
There are two ways QR codes can be used in Menu Drive.
- You can make QR codes used for each table.
- You can make QR codes used for each seat at each table.
To start creating QR codes, navigate to the Dine-In QR Code page under Settings.
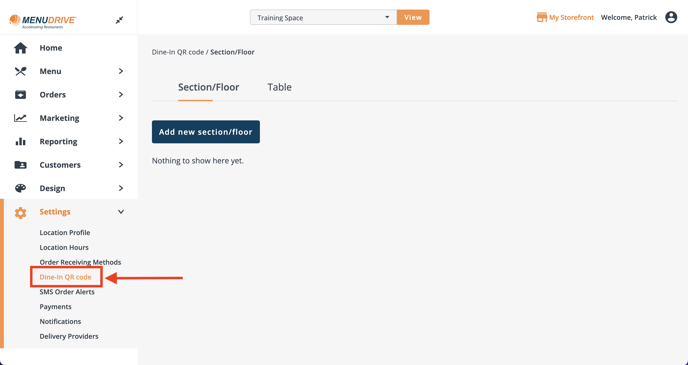
Start by creating a section/floor.
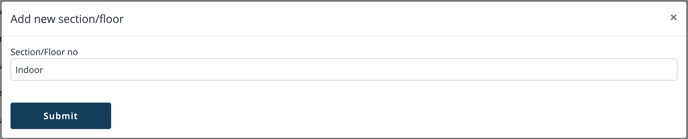
Note: A section's name can only contain alphanumeric characters, a hyphen, a minimum of 2 characters, and a maximum of 10 characters.
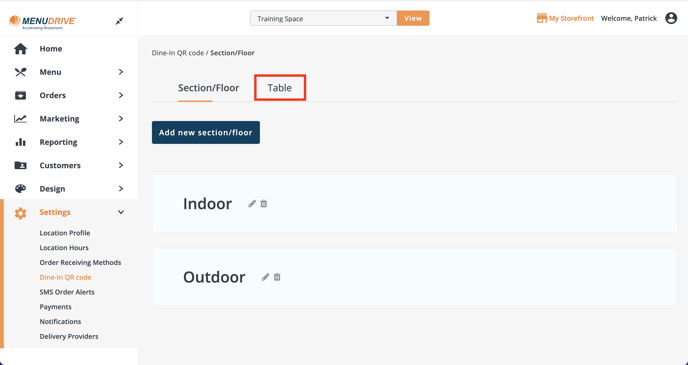
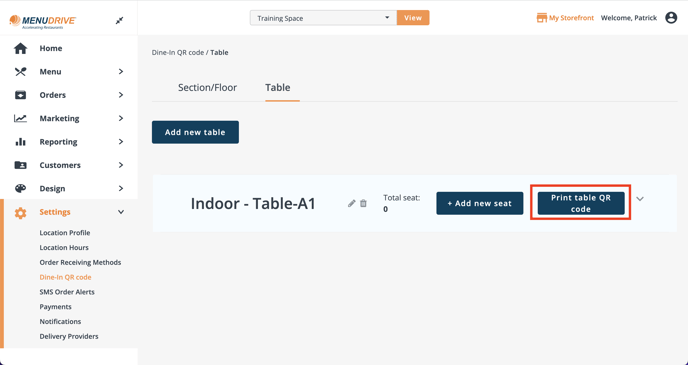
Once your sections have been created, you can start to add tables and/or seats by clicking on the Table tab.
Click Add a New Table to begin creating a new table. Select the section, and provide a name for your table.
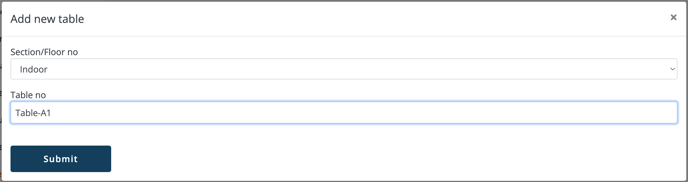
Note: Your table name can only contain alphanumeric characters, a hyphen, a minimum of 2 characters, and a maximum of 10 characters.
If you are creating QR codes just for tables, you can generate your QR code by clicking Print table QR code. You can then print your QR code and place it on your designated table.
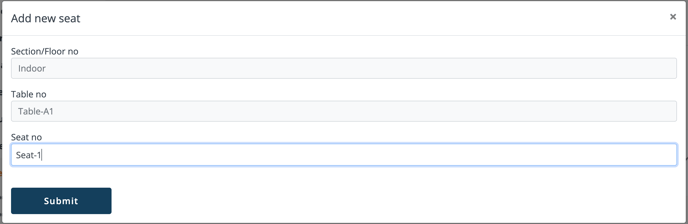
If you wish to create QR codes for each individual seat, click Add Seat and provide a name for your seat.
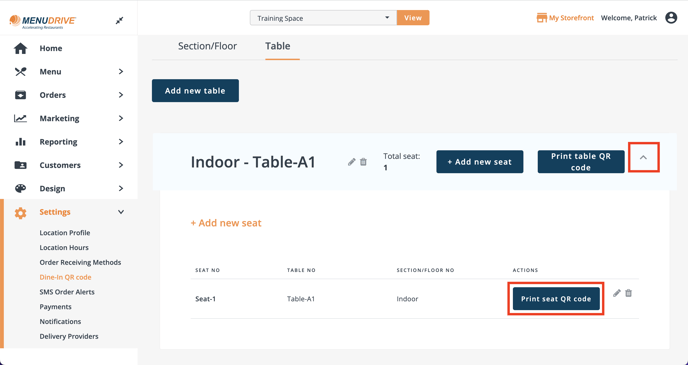
Once your seat has been added, you can click on the dropdown icon on the right side of your table name, and click Print seat QR code.
When your customers use your QR codes to place and pay for orders, you will be able to see the table and seat number on the kitchen ticket that is printed.
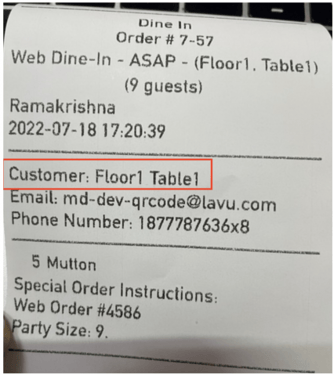
This information will be available regardless of which order receiving method you use, including:
- Email and text notifications
- Order Dashboard
- IP Printer
- Lavu POS integration