The “Multi-Location Menu Management” is a menu management solution for restaurants running multiple locations. It is an enterprise solution that will allow you to manage your menu items, pricing, specials, and other settings across all of your locations, like taxes and discounts. MLMM works like an umbrella configuration. One or more primary locations can be configured for a chain of locations. The menu can be managed from a primary to non-primary locations. Menus cannot be managed between two primary locations.
Benefits of Multi-Location Menu Management:
- Menu can be updated quickly and managed to multiple locations in a single action.
- Menu changes can be easily managed/recalled.
- Set different prices for menu items to the specific locations.
- It saves time updating menus, specials, discounts, and other settings all at once over updating them location by location.
Prerequisites
- You must be using the newest version of the Lavu Control Panel.
- You must have at least two locations.
- All locations must be mapped to a chain of locations in the Lavu Control Panel.
Important Note: Locations using MLMM need to be synced completely with the primary account. The primary location’s menu will need to be synced fully to other locations in the chain, replacing the chained location’s menu with the primary location’s menu.
Enterprise Management
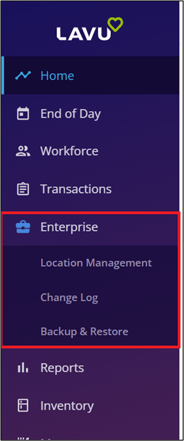
Once you have signed up for MLMM, the customer success team will enable the new extension “Enterprise Management” on your primary location. With the new extension enabled, a new option will appear on the left-hand side menu called “Enterprise”. Three new pages are included under this new option: Location Management, Change Log, and Backup & Restore.
Location Management
Location Management consists of three sections: Menu Transfer, Menu Changes & Other Changes.
I. Menu Transfer
The menu transfer tool allows you to transfer menu changes from the primary location to your other locations. You can easily update the menu for all your chain locations at once using this tool.
Before you can sync changes between locations, you first need to conduct a Full Sync.
Full Sync is when everything in the specified target location(s) menu gets replaced by the primary location menu. A full sync is mandatory to perform the first time MLMM is used. It will allow you to transfer changes from the primary location to the target location(s) so that all menus are exactly the same.
To conduct a full sync, click the blue Options button.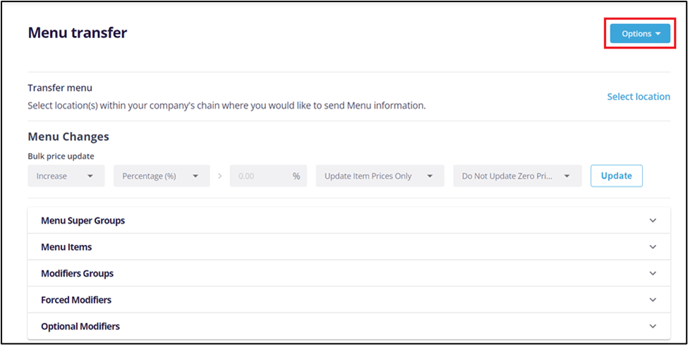
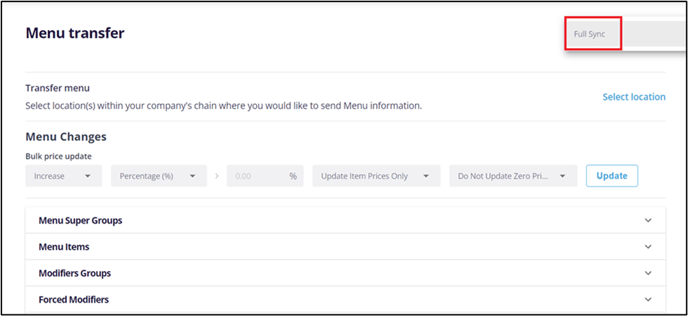
Click Full Sync
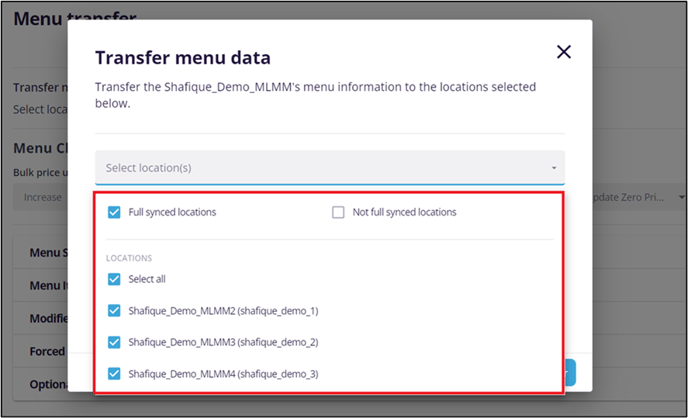
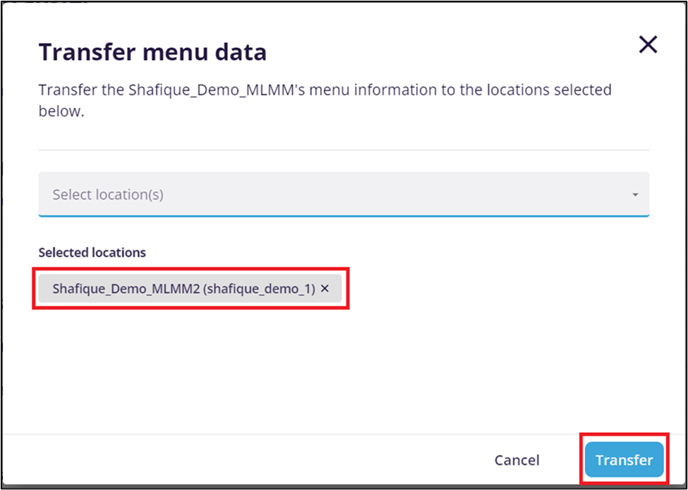
The Transfer Menu Data pop-up window will appear. Click on the Select location(s) dropdown.
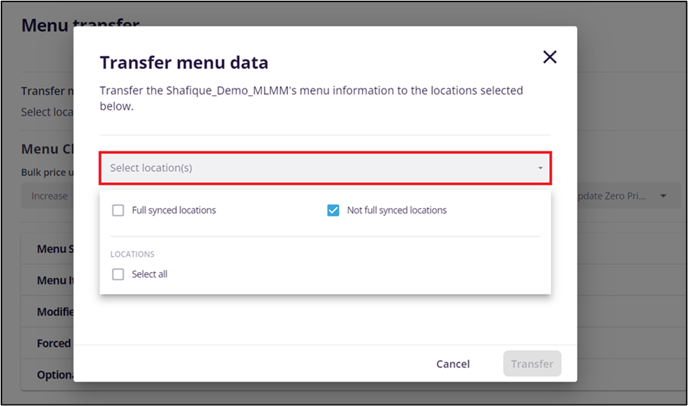
Note: “Full synced locations” means it has been synced with the primary location at least once. “Not full synced locations” means those locations have not been fully synced. Locations only need to be fully synced once.
Select locations from the list that you want to sync with the primary location, or click Select all to select all the locations available.
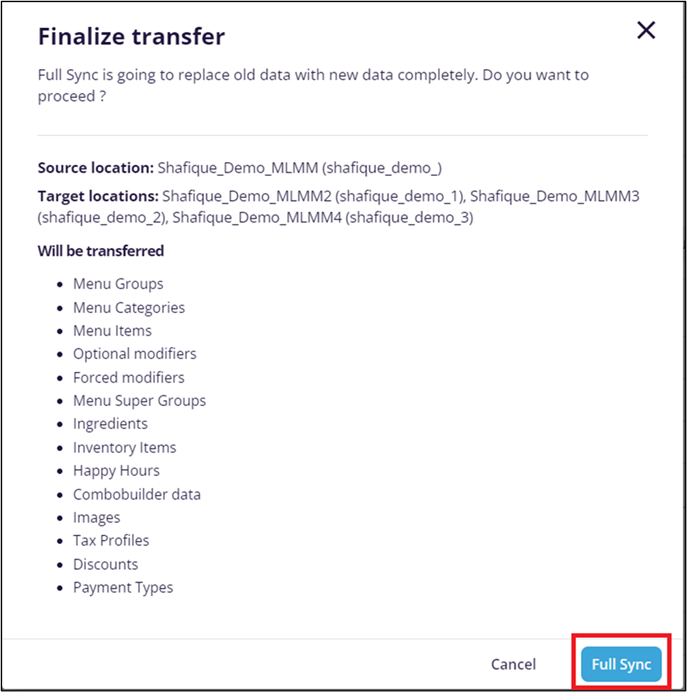
After that, click the Transfer button to transfer the primary location menu to all locations you selected.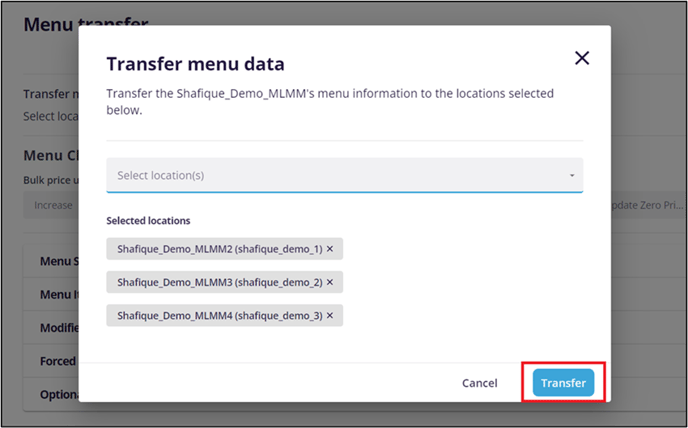 The Finalize transfer window will now appear, which displays the sections that are transferring from the source location to the target locations. Click on the blue Full Sync button.
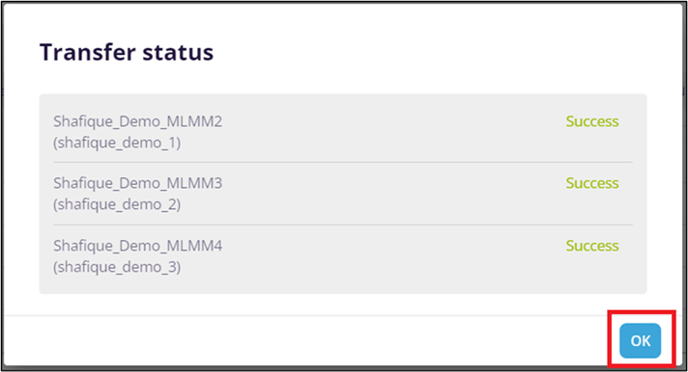
A transfer status window will appear along with a success message for each location. Click on the OK button to complete the process.
Additional Point
For chain locations that are associated with MenuDrive accounts - when we do a full sync from a primary location to a single child location, or multiple locations within the chain, the entire menu of the MenuDrive account needs to be reimported from Lavu. This process will remove all images so those will have to be re-added manually. Once the Import is completed, the new MenuDrive menu needs to be reviewed and minor adjustments may need to be made such as item sequencing or adding additional item details or modifiers that are different in Lavu. If a MenuDrive menu item needs to be added as an additional menu item other than available in Lavu POS, it can be created by MenuDrive and it needs to be kept unlocked so that when future Syncs/Transfers are done it will not affect those unlocked items.
Transfer Menu (Incremental Sync)
After a full sync has been completed, you can now conduct an “Incremental sync” with those locations. An incremental sync is when a menu item is added or updated on the primary location and then transferred to a target location using the Menu Transfer section within your Enterprise -Location Management. The changes are updated in the target location without altering any items that were added specifically to the target location(s) beforehand. This means you can have location-specific items, and still use MLMM.
Note: This applies to all other sections under menu changes.
After making any changes in the primary location, navigate back to Location Management and click the Select location.

Select the respective locations you want to transfer your updates to, and click on the Transfer button.
Afterward, you can go to the location you just synced with, and ensure that the changes have been successfully transferred.
Additional Point:
For chain locations, when we do an incremental sync from a primary location to other locations within the chain (child locations), if you don’t want certain items to be affected in MenuDrive please make sure to keep those items unlocked in MenuDrive before doing the incremental sync.
II. Menu Changes
Bulk Price Update:
Under Menu Changes, you have an option for “Bulk Price Update.” This allows you to update the prices of your menu items, modifiers, or both simultaneously. The updated prices will only apply to your primary location. You can later sync the prices with your other chain locations using the Transfer Menu tool.
Select the required options from all dropdowns, update the percentage or price in the respective field, and click the Update button.

After that, you will receive a success message once the prices are updated successfully. 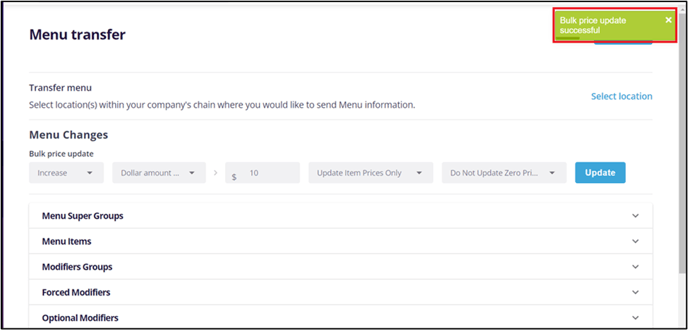
Menu Changes:
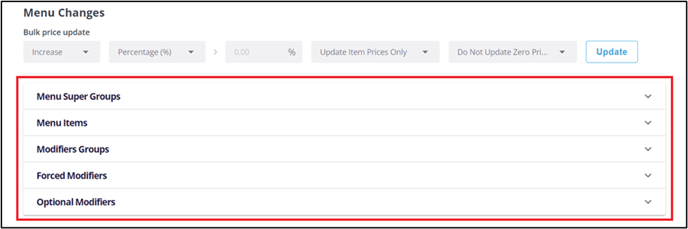
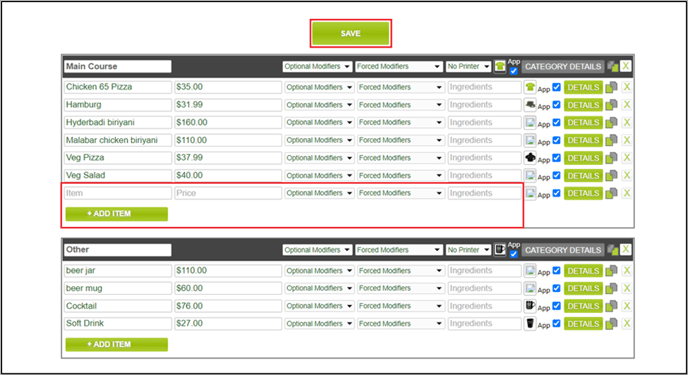
Under Menu Changes, apart from “Bulk Price Update,” you will also be able to update and manage Menu Groups, Items, Categories, and Modifiers. Without leaving the page, you can make and save changes here.
For example, click on the menu items dropdown to make changes to your menu items.
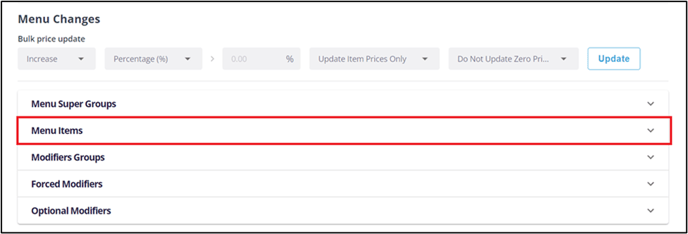
Menu changes can be done just like normal. Click on the + ADD ITEM, update the item details in respective fields, and click on the SAVE button to keep the details.
After adding to Menu Items (or any other section in your menu), you will need to refresh the page so you can perform a “Backup”. Backups are covered further down in this article.
Once the backup is completed, you can follow the steps above for an Incremental Sync.

Important Notes:
- Follow the above process to make changes for other sections, i.e., Menu Super Groups, Modifier Groups, Forced Modifiers & Optional Modifiers, under menu changes from primary location to targeted locations.
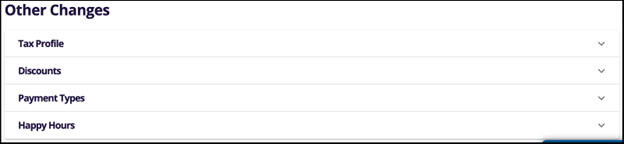
- The above process also applies to other sections under other changes, i.e., Tax Profiles, Discounts, Payment Types & Happy Hours.
Tax Configuration
If you have multiple business locations in different regions or states with varying tax structures, "Tax Configuration" will allow you to maintain those differences while also syncing your menu over time. It also allows you to keep taxes from changing with each sync, even if the rates are the same across locations.
To access these settings, click on “Tax Configuration” after clicking on the blue Options button.


When you click “Tax Configuration,” you will see the following options.

If you are conducting a full sync for the first time, we recommend selecting the first option, Copy Tax Profiles and Tax Rates.

After a Full Sync, you can go to each of your child accounts and update the tax rate to the proper amount. Then, come back to your parent account, and select Copy Tax Profiles Only (No Tax Rates).

From here on out, you should only be doing incremental sync by selecting the blue Select Location button. With these settings in place, you can maintain different tax rates at your different locations while keeping your menu the same.
Change Log
The "Change Log" can be used to show you a history of menu syncs made with MLMM. It will record Full and Incremental Syncs between locations, as well when the transfer happened, and who conducted the sync. Finally, you have the ability to restore the most recent changes using the Revert button.
Full Sync - Full Sync is recorded when you use the Full Sync button under the blue options button. Remember, this action replaces everything in the destination menu with the primary location’s menu.
Sync - Sync is recorded when you transfer the menu from the primary location to any of your other locations. It updates the changes made in the primary location to the target location without deleting anything in the target location. 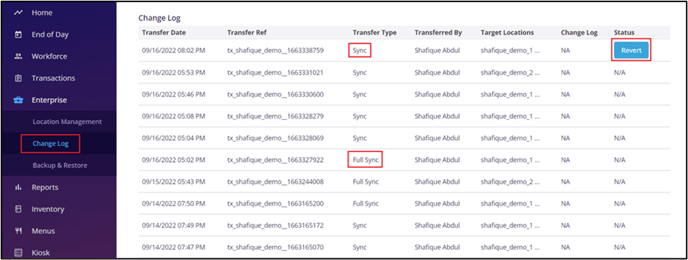
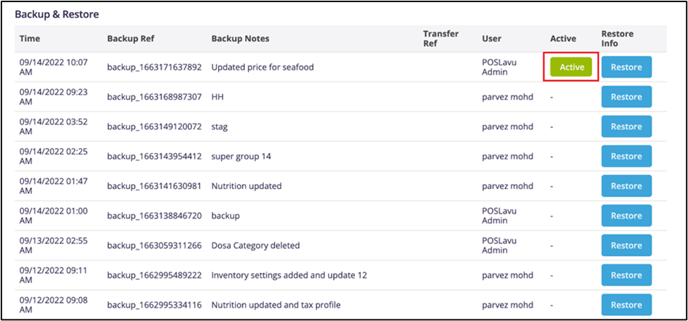
Backup & Restore
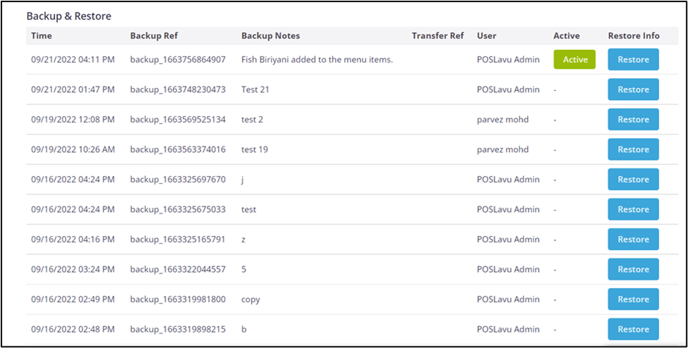
The “Backup & Restore” page stores information whenever you change your menu and create a Backup through the Location Management page. It allows you to not only see all of the changes that have been made, but also the ability to restore your menu to a previous state. Only the last 25 changes will be available in Backup & Restore. The green Active button indicates the current menu being used on your account.
Backup
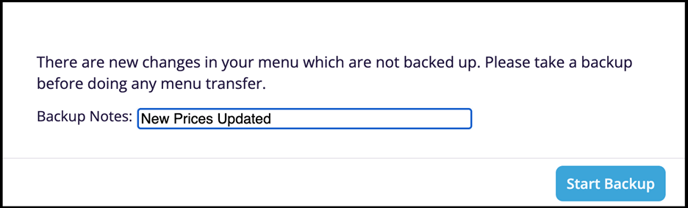
Whenever your menu has been added to or updated, and you navigate to the Location Management page, you will be prompted to create a new backup save state. This prompt cannot be dismissed without completing it. You will simply need to provide update notes and click the blue Start Backup button.
This prompt can also be triggered by making changes on the Location Management page, and refreshing the page.
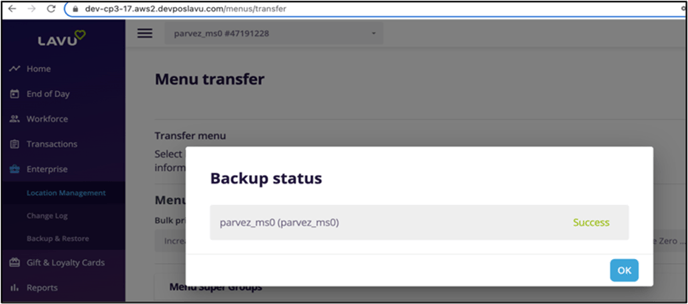
Once the backup is completed, you will be provided with a success message.
After completion of the Backup process, the details get updated under the Backup & Restore section.
Restore Your Menu
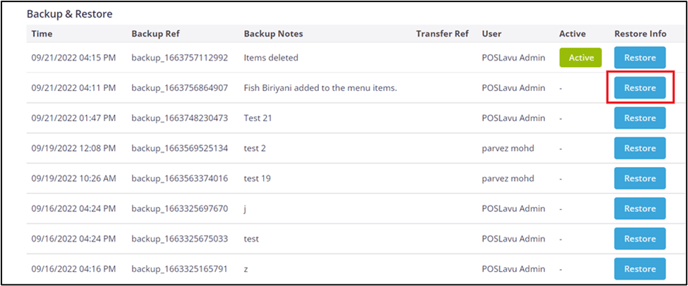
Restoring your menu to a previous state is very simple. Locate the version you want to restore to, and click the blue Restore button.
Note: Only the last 25 backups are stored on this page.
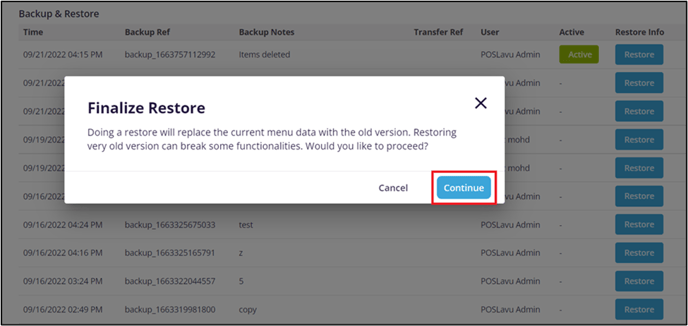
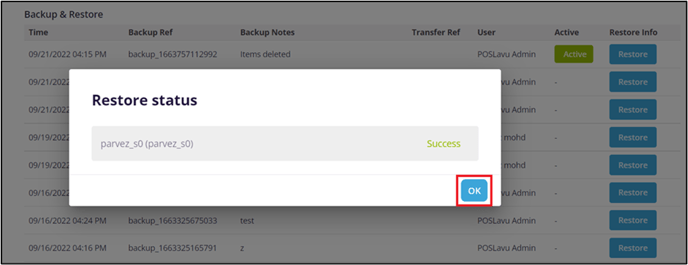
After clicking on the Restore button, you will then get the “Finalize Restore” popup window to confirm your choice. Click on the Continue button to restore your menu.
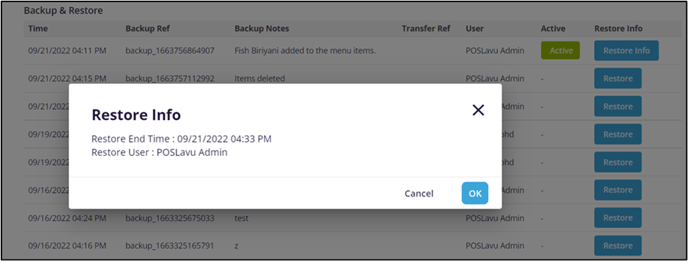
After the restoration you can click on the blue Restore Info button to see additional information about the backup, including the date and time the restoration occurred.
Glossary
|
Abbreviation |
Full Form |
|
MLMM |
Multi-Location Menu Management |
|
ECP |
Enterprise Control Panel (ECP) is the closed-loop business control across an enterprise operated by the internal team. |
|
CP |
Control Panel allows restaurant owners to manage or update the settings |
|
POS |
Point Of Sale (POS) is where the customer makes a payment for products or services. |
|
Log |
Log is an application history containing information about events within the application. |