Adding a cash drawer to your POS system will simplify cash intake management and allow use of Lavu’s ability to open the drawer from the application.
Lavu supports a single cash drawer manufactured by APG Cash Drawer. While Lavu endorses the use of Epson printers with the POS, this cash drawer may also be used in conjunction with compatible Star Micronics printers. However, Epson and Star Micronics use different cables to connect the printer to the drawer.
Note: Use of the wrong cable can cause an electrical short resulting in damage to the printer and/or cash drawer.
For this reason, it is important that the Lavu Sales Department be consulted on the purchase of APG products intended for use with the Lavu POS. The Sales Team is available by phone, during regular business hours, Monday-Friday at 833-831-5288, or via email at sales@lavu.com.
Once the appropriate hardware is acquired, setting up the cash drawer is a simple process. Most of the work will have been done during receipt printer setup, which should be completed prior to the addition of a cash drawer.
Components
Each APG Cash Drawer package purchased from Lavu should include the following:
1. Cash Drawer
2. Keys
3. Connection Cable
4. Drawer Till - The removable tray inside the drawer containing compartments to separate cash and coinage denominations.
CONNECTING THE CASH DRAWER TO A RECEIPT PRINTER
1. Carefully tilt or turn the cash drawer over so the connection port on the bottom right corner is accessible.
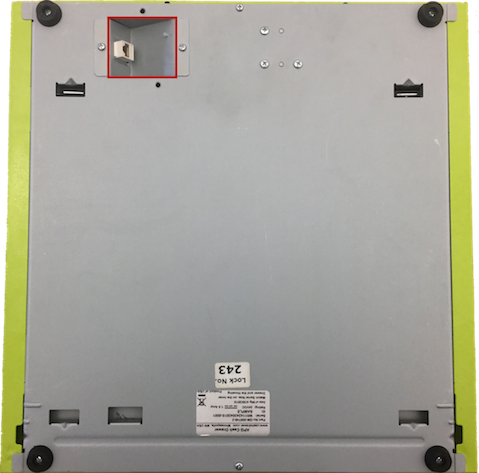
2. Connect the large end of the connection cable to the drawer’s connection port. Place the cash drawer right-side up again.

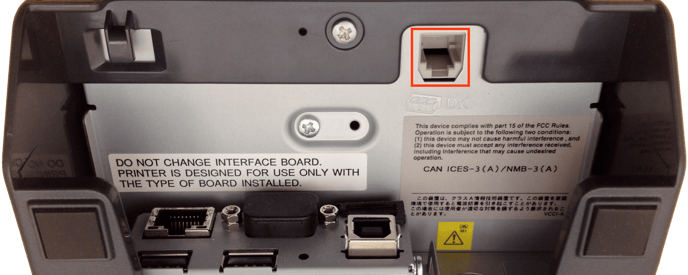
3. Connect the small end of the connection cable to the receipt printer’s RJ12connection port.

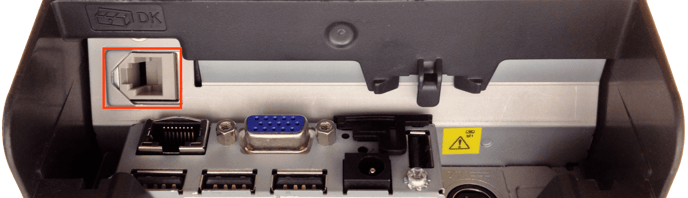
5. The Epson TM-T20II model printer’s RJ12 port is located on the back of the device between the power and ethernet ports.
OPENING CASH DRAWER
An iPad Terminal must be paired with the receipt printer as a register in order to open the cash drawer from the POS application.
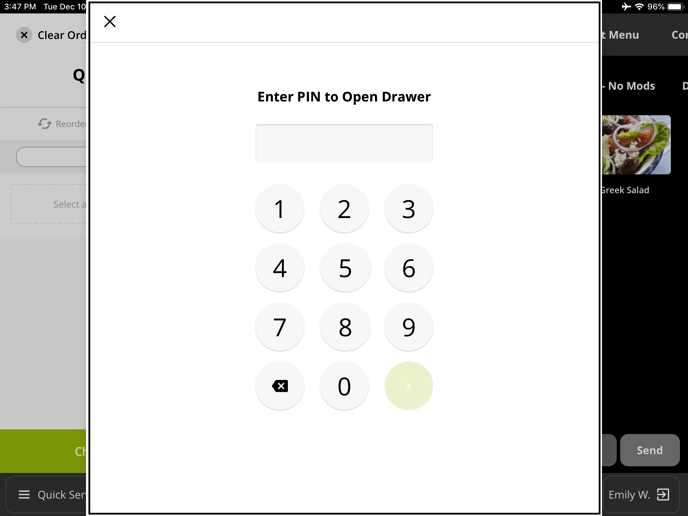
1. To open the cash drawer from Lavu, tap the $ symbol button from the Quick Serve, Tab, or Table service type screen.
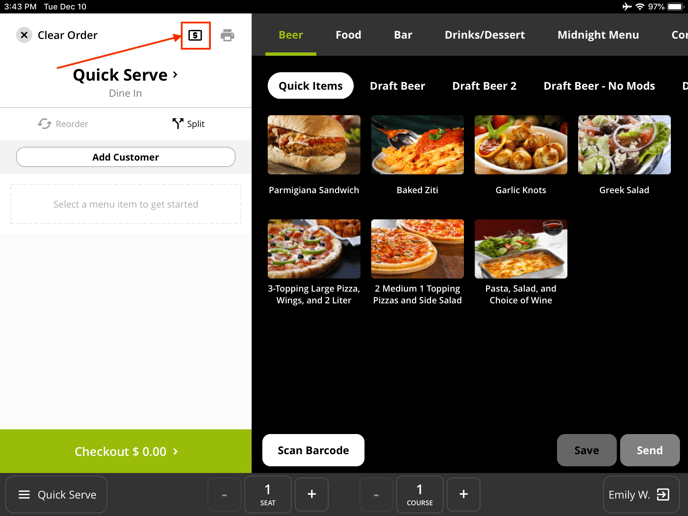
2. You may be asked to enter your PIN in order to open the cash drawer.
ASSOCIATED CONTROL PANEL (BACKEND) SETTINGS
The system can also be configured to allow cash drawers to open automatically when applying cash payments and other transactions. Settings governing cash drawer operation may be found in Advanced Location Settings under the Advanced Location Settings - Check Out Options section.
The Following settings will determine when, or if, the cash drawer opens automatically when certain payment types are used.
1. Enable or disable Open cash drawer when applying cash transactions.
2. Enable or disable Open cash drawer when applying credit transactions.
3. Enable or disable Open cash drawer when applying other transaction types.

User Access Level required to open the drawer must also be selected.
1. Access Level required to open cash drawer - Users at or above this level will be able to open the drawer manually using the “Open Register” button.

2. Access Level required to open cash drawer when entering payment - The cash drawer will open automatically for users at or above this level in accordance with the enabled auto-open settings.

For any further support, please reach out to our 24/7 customer support team at 505-535-5288 or email support@lavu.com.