Lavu supports a number of different printers from Epson and Star Micronics. Luckily, their basic setup are all the same. This article will take you through each step in setting up your printer.
Basic Setup
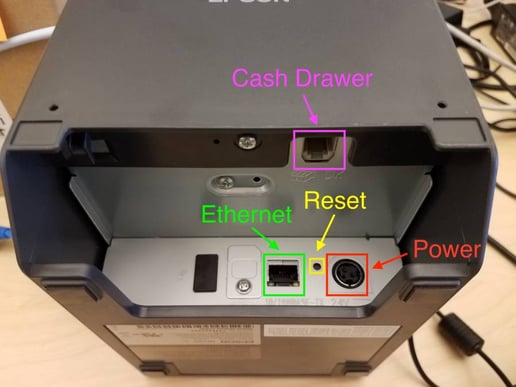
Start by connecting your printer to power and to your network with an ethernet cable. If you have purchased a Wifi model printer, you should instead have a USB adaptor that you will plug into your printer.
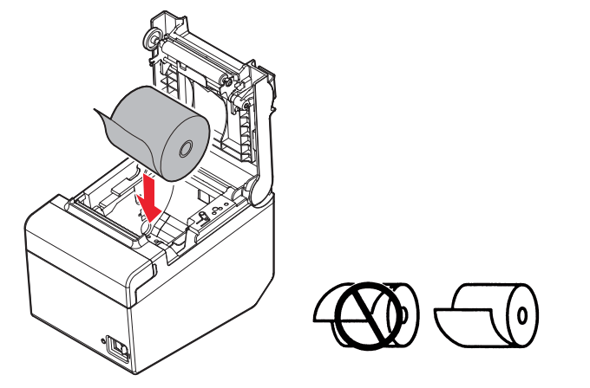
Be sure to also take this time to load paper into your printer.
Set a Static IP Address
Your next step should be to set a static IP address to your printer. This will ensure stability while you use your printer, and that you won't face any unnecessary errors while using the POS.
You can reach out to our support team at 833-381-5288, or email support@lavu.com. If you prefer to handle this yourself, you can follow the instructions here to learn how to set a static IP address for your Epson branded printer.
Create the Printer Profile
Our next steps, and potentially final steps, are going to take place in the Lavu Control Panel (cp.poslavu.com).
Once you are logged in, click on Settings on the left hand side, and click on Printers/Technical. From here, select Printers/KDS.
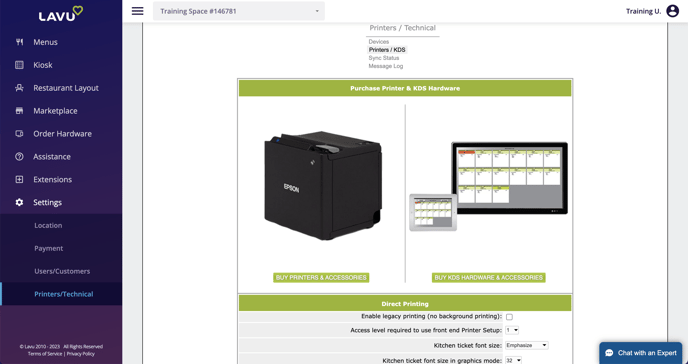
Scroll down to Printers/KDS and click on Add New to begin creating a new printer profile.
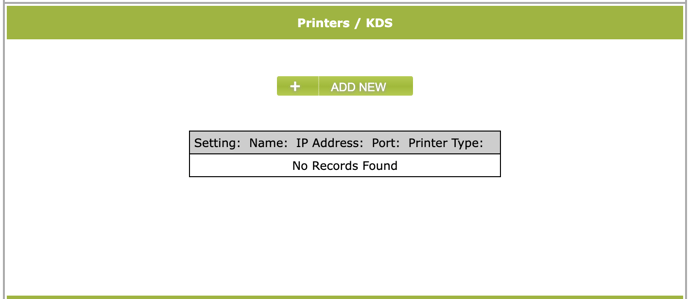
If you are creating a profile for a printer that will receive orders, select kitchen from the Setting dropdown. If you are creating a profile for a printer that will be printing your customer's receipts, select receipt from the Setting dropdown.
Every profile you create after this first one will need a different printer setting. So the next kitchen printer you create will need to have kitchen2 selected. The same will apply to your receipt printers.

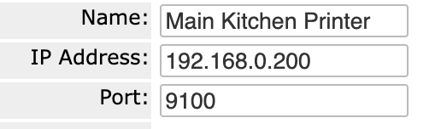
Next give your printer a name, type in the static IP address you set previously, and enter 9100 as the port number.
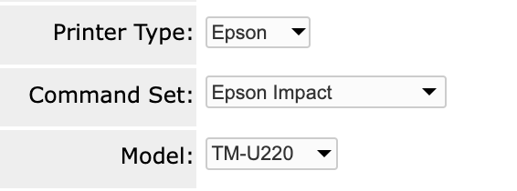
Next you will select your printer type, command set, and printer model. The command set for Epson printers will either be Impact (only for the U220 printer), or Thermal (for all other printers).
Your model number can be found on the side of your printer.
The rest of the settings can be left blank, or at their default values. However, one of these settings you may want to check over is the Image Capability setting. If you wish for your print outs to be larger, or for your logo to print on your receipts, you will want to make sure this is enabled.

Once you have finished applying these settings, click Save at the bottom to finish creating your printer profile.
Assign Kitchen Printers to Your Menu
If you are creating kitchen printers, the final step will be to use your printer in your menu. This is how Lavu POS knows which of your printers to send items to when you tap Send on the POS.
Navigate to your menu, and find the category you want to assign your kitchen printer to. Select the printer from your list in the dropdown marked below.

If you do not see any printers in this dropdown, navigate back to your printer profiles, and ensure at least one of your printers has a kitchen setting applied to it.
Assign Receipt Printers to Your POS
If you are creating receipt printers, the final step will be to use the POS to pair your iPad to your receipt printer.
Navigate to Register Functions, and tap on Select Register. Here you will find a list of all of your receipt printers.
Simply tap the printer you want to pair your device to, and you're done.
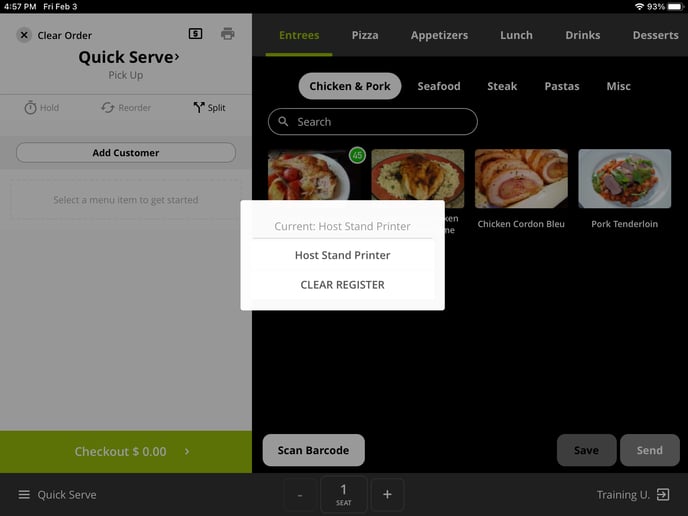
If you do not see the option to select a register, navigate back to your printer profiles and ensure that at least one of your printers has a receipt setting applied to it.