A wireless printer has a very involved setup process as opposed to a traditional hardwired printer with a simple ethernet cable. This article will take you through the steps you need to attach your wifi Epson printer to your own wireless network.
If you are having trouble working through these steps, we encourage you to reach out to our 24/7 customer support team at 833-381-5288 for additional assistance.
Printer Setup
Before we begin, we will need to make sure the printer is physically set up correctly. Luckily for wireless printers, there are only two (potentially three) connections that need to be made:
- Power
- Wireless adaptor
- Cash Drawer (optional)
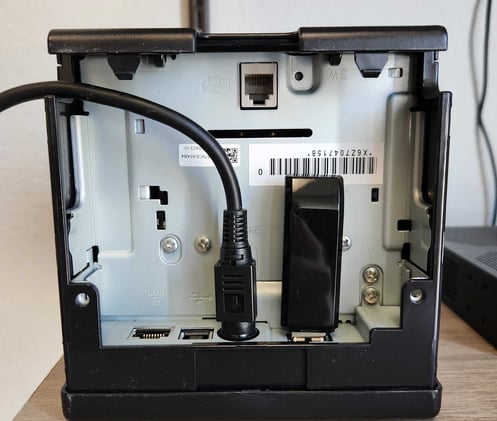
Note: For the initial setup, you only need to connect power and the wireless adaptor.
Wireless Setup
With everything connected, turn the printer on and wait for the power light to show a steady light. Wait a couple more minutes, and the printer should give you a small slip of paper that says SimpleAP Start.
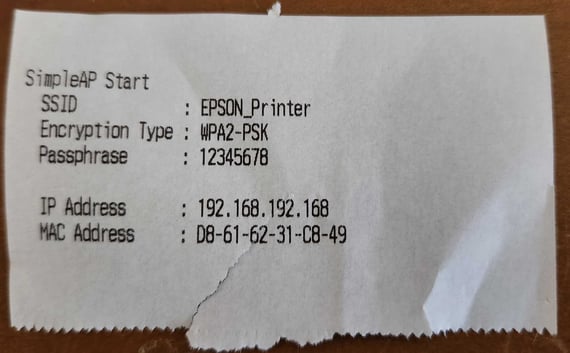
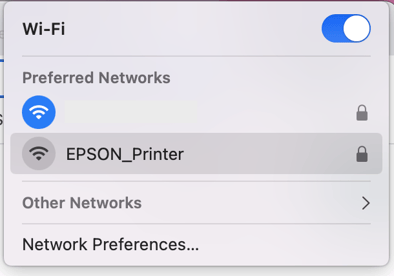
Next, on either a computer or iPad, you will need to connect to the printer's wifi network labeled EPSON_Printer.
If you are prompted for a password, it will either be "12345678", or the printer's serial number.
Once connected to this new network, open a web browser and enter the IP address 192.168.192.168 into the address bar.
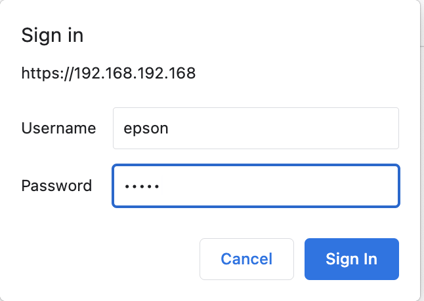
You will likely be presented with a warning message. Simply click Advance, and the Proceed Anyway.

You will then be presented with another username and password field. For older Epson printers, you simply need to enter epson for both the username and password. For newer printer models, epson will be the username, while the password will be the printer's serial number.
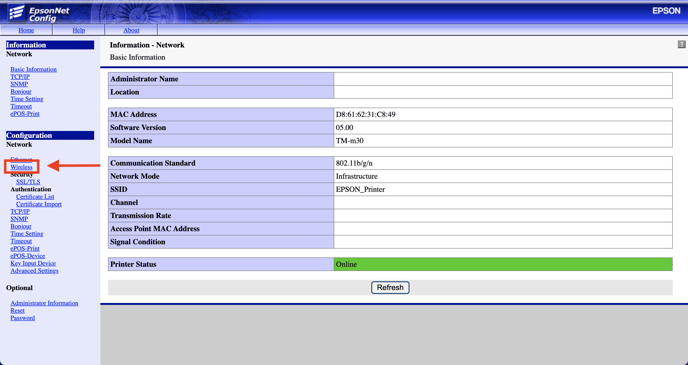
You will now have access the printer's configuration page. Along the left hand side, underneath Configuration, click on Wireless.
In the dropdown next to Communication Standard, select Auto.
In the text box next to SSID, enter the name of your wifi network.
In the text box next to WPA Pre-Shared Key, enter the password to you wifi network.
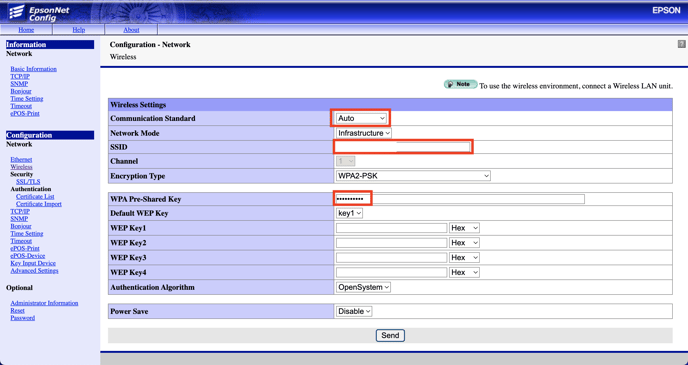
Finally, click Send at the bottom of the page. Then when prompted, click Reset.
At this point your printer will turn off and back on again automatically. The last steps we will highly recommend you take is to set a static IP address to your printer. You can follow the steps in the article here to do just that.