Happy Hours
A short article detailing how to create and apply happy hours to your menu.
Happy hours in Lavu can be used in two ways.
- To give special prices on menu items
- To mark menu items as available or unavailable
The first option acts like a traditional happy hour, giving a special discount during certain times of day.
The second option can be used for items that are only available at certain times of day, like a brunch menu only being available in the morning, or just on weekends.
No matter what kind of happy hour you are trying to make, they are created and applied to your menu in the same way.
Creating Happy Hours
Once you are logged into your admin Control Panel, click on Menus on the left hand side, and click on Happy Hours.
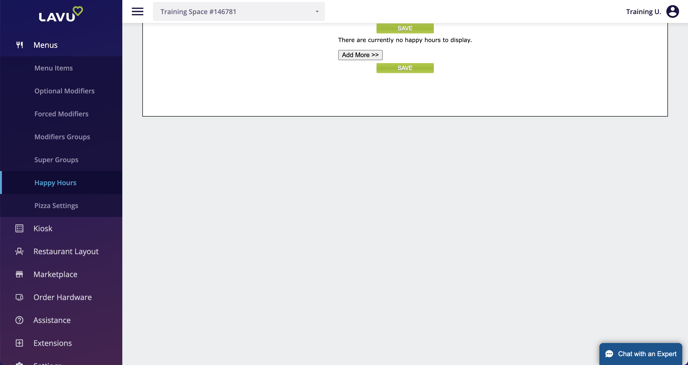
To create your first happy hour, click the Add More button.
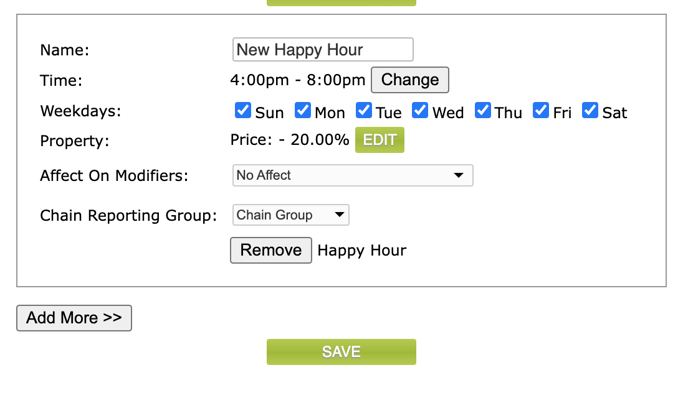
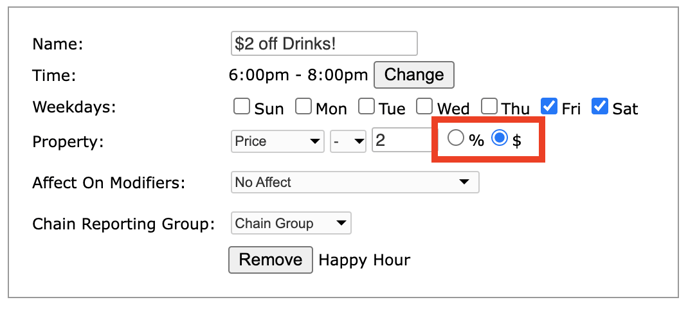
Here you will be able to give the happy hour a name, set the time the happy hour takes place, the days of the week the happy hour takes place, what kind of affect it will have, and what it should do any prices on connected modifiers.
Note: Chain reporting group is an option only available to Lavu accounts with multiple locations.
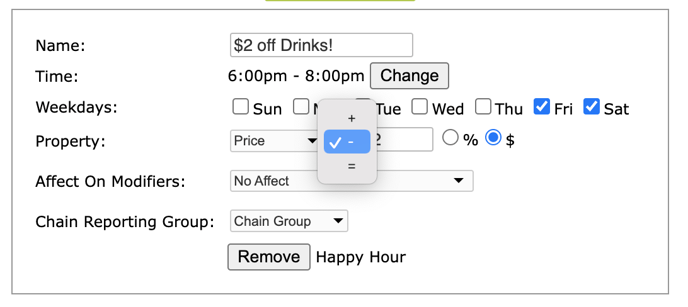
When creating a happy hour that affects your item's price, you can choose how it affects your price.
- You can have the happy hour add to your item's price.
- You can have the happy hour subtract from your item's price (most common).
- You can have the happy hour set your item to a specific price.
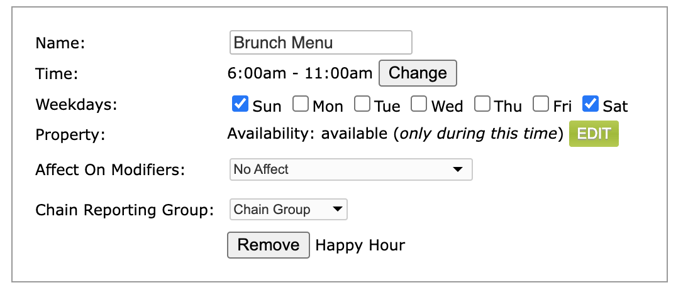
If you are choosing to create a happy hour that affects availability, you can choose mark the items as Available or Not Available.
Once the happy hour has been created, click Save at the bottom or top of the page.
Applying Happy Hours to your Menu Items
Now that a happy hour has been created, you can now apply it to a menu category, or specific menu item.
Navigate to Menu Items on the left hand side of the page, and click one either the gray Category Details button, or the green Details button next to a menu item.
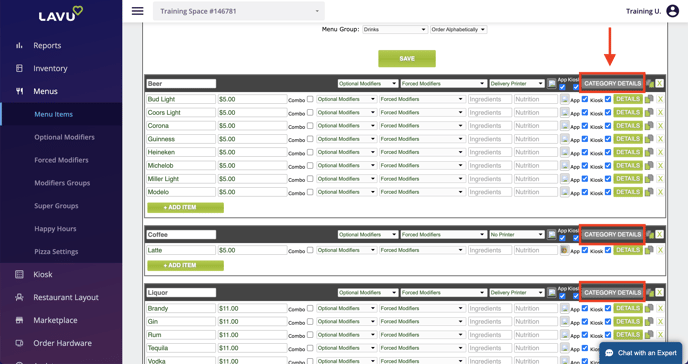
At the bottom of the details pop up for a category or item, you will see a section labeled Happy Hours. Here you will see a list of all of the happy hours you have created on your account. Simply select which happy hour you would like to apply to your menu, by selecting Enabled from the dropdown menu.
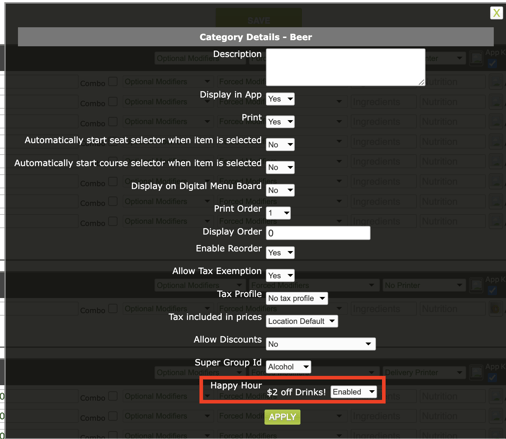
Don't forget to click Apply and then Save on your menu to apply your changes.
Note: You are able to apply multiple happy hours at the same time to a menu category or item.
Applying Happy Hours to your Modifiers
Happy hours can be applied directly to your Forced and Optional Modifiers. Navigate to their respective pages in the Control Panel, and find the Happy Hours dropdown on the right side of the page.

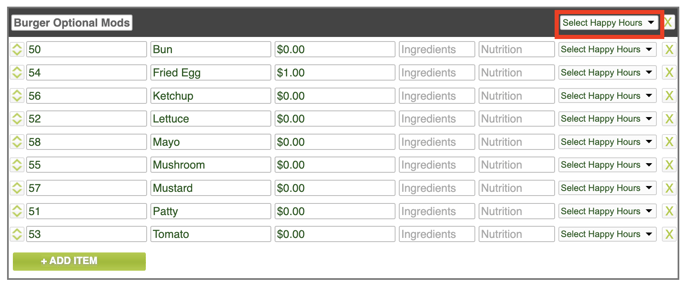
Note: When applying a happy hour to a modifier, it must also be applied to the menu item or category that it is attached to.
Multiple Happy Hours per Day
If you want to have more than one happy hour active on a single day, you will need to adjust a setting in your account's Advanced Location Settings.
In Advanced Location Settings, scroll down to Account Settings, and find the setting Disable Multiple Happy Hours per Day. Make sure this setting is unchecked. This will allow you to create multiple happy hours that overlap on the same day.

Happy Hours on the POS
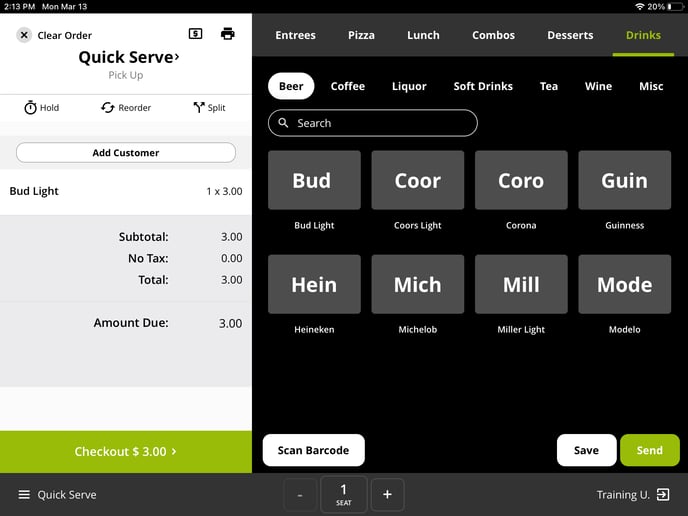
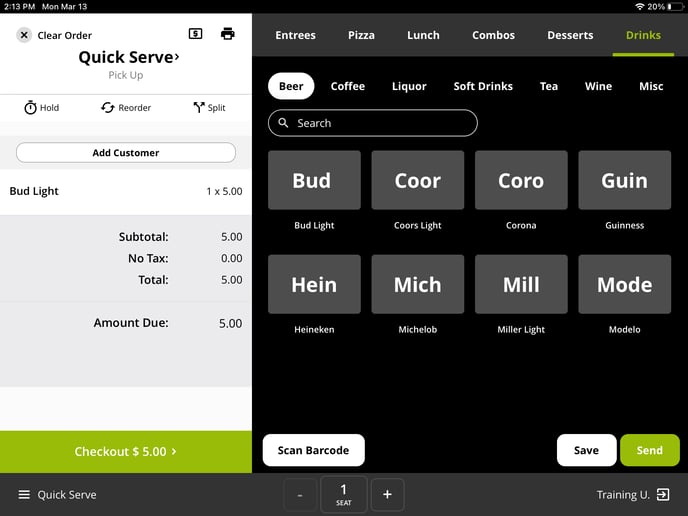
Once happy hours have been created and applied to your menu you will start to see their affects immediately once the time on the iPad lines up with one or more of your happy hours.
Note: Happy hours that change a menu item's price will NOT have any indicator that a happy hour is in affect. If you are unsure of whether or not a happy hour is working, ring up the item on your POS during your happy hour, and compare the price with what is assigned in your Control Panel.
In other words, the only thing that will be different, it the menu item's price.
Happy Hour in Affect:
Happy Hour not in Affect:
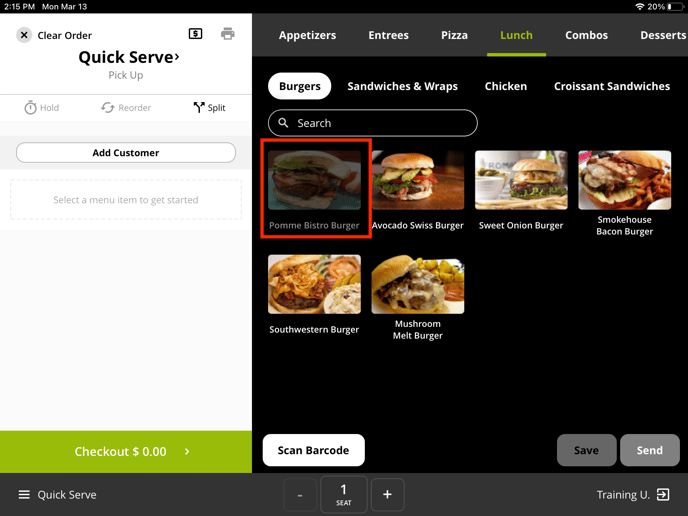
Availability happy hours will gray out items and modifiers that are unavailable.
Availability Happy Hour:
