A wireless Epson printer can be set up in a number of ways. If you prefer to use a guided application, follow the steps in this article to connect your wireless printer to your restaurant's WiFi network.
If you prefer a faster but slightly more technical walkthrough that doesn't use an app, follow the instructions in the article here.
If you are having trouble working through these steps, we encourage you to reach out to our 24/7 customer support team at 833-381-5288 for additional assistance.
Printer Setup
Before we begin, we will need to make sure the printer is physically set up correctly. Luckily for wireless printers, there are only two (potentially three) connections that need to be made:
- Power
- Wireless adaptor
- Cash Drawer (optional)
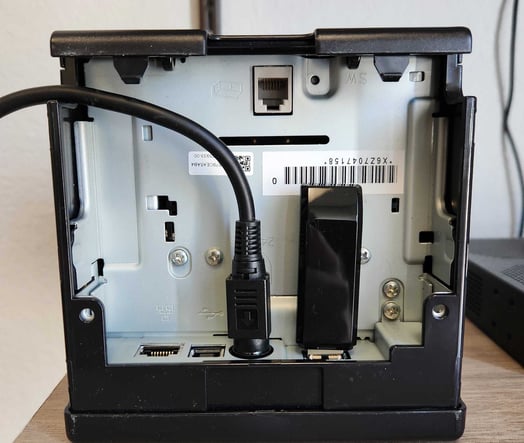
Note: For the initial setup, you only need to connect power and the wireless adaptor.
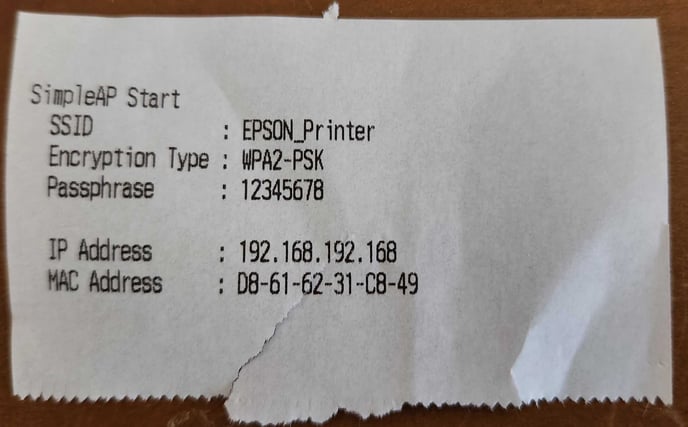
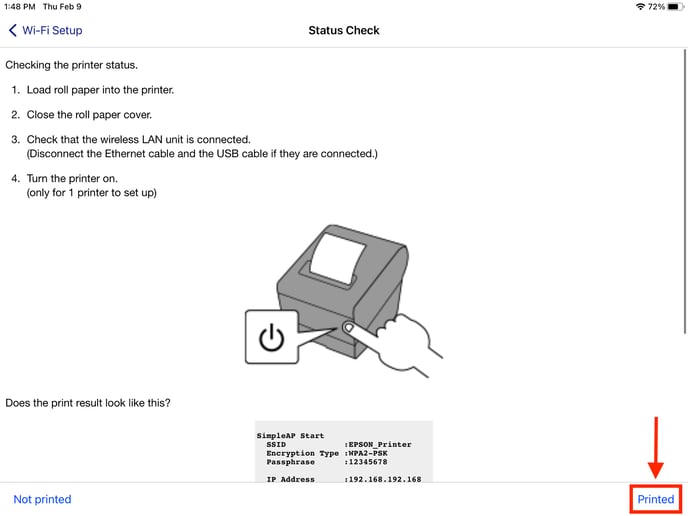
With everything connected, turn the printer on and wait for the power light to show a steady light. Wait a couple more minutes, and the printer should give you a small slip of paper that says SimpleAP Start.
Using the TM Utility App
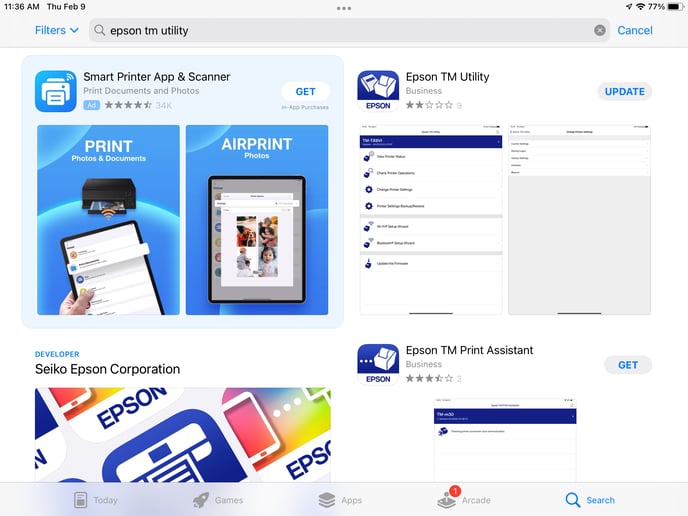
Since we are using an application to set up our wireless printer, we will first need to download the app from the Apple app store. This is a free application that you can find by searching "epson tm utility"
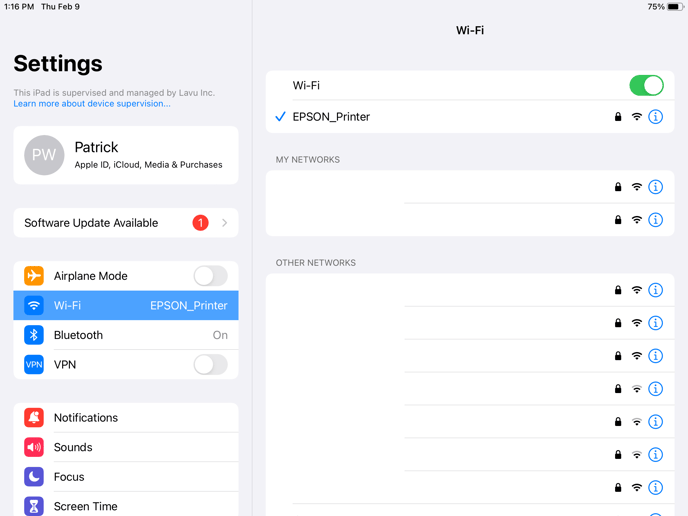
Before we open the app, you will want to go to your iPad's WiFi settings, and connect to the EPSON_Printer network. This is a small WiFi network created from your wireless printer. If you are prompted for a password, it will either be "12345678", or the printer's serial number.
Once the app is downloaded, and you are connected to the printer's WiFi network, open the app and tap Wi-Fi Setup Wizard. You will need to scroll to find this option.

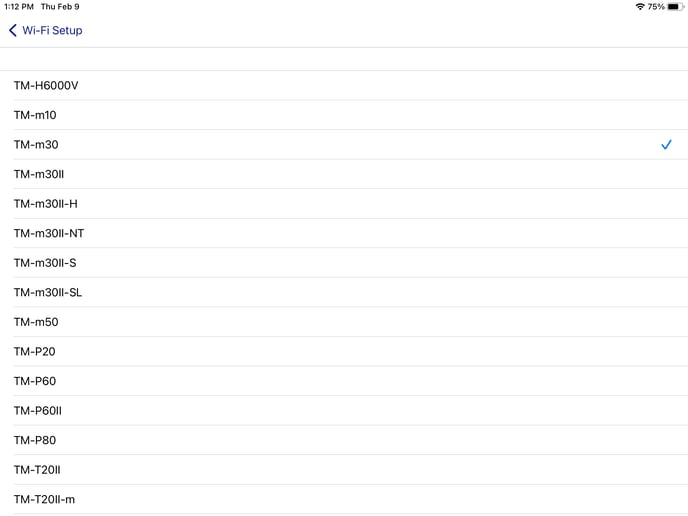
Tap Printer and select the model of printer you are using. The model number of your printer can be found on the side, or on the bottom of the printer.
Confirm that the SimpleAP Start print out has indeed printed. Tap Printed in the bottom right corner.
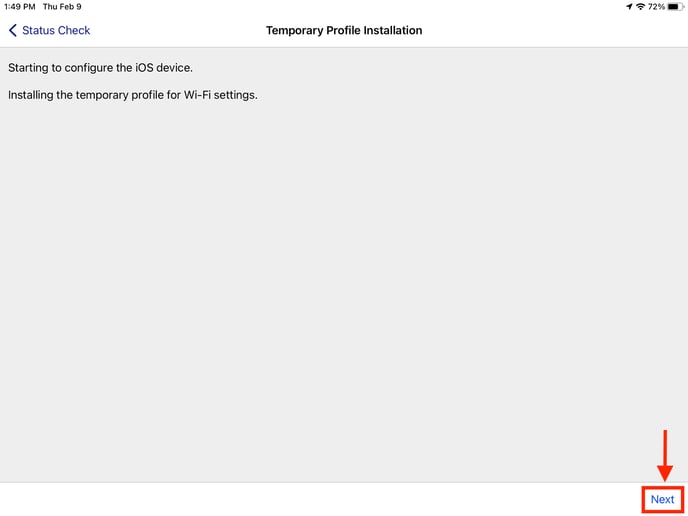
Tap Next.
The Safari web browser will open up. Tap Allow.
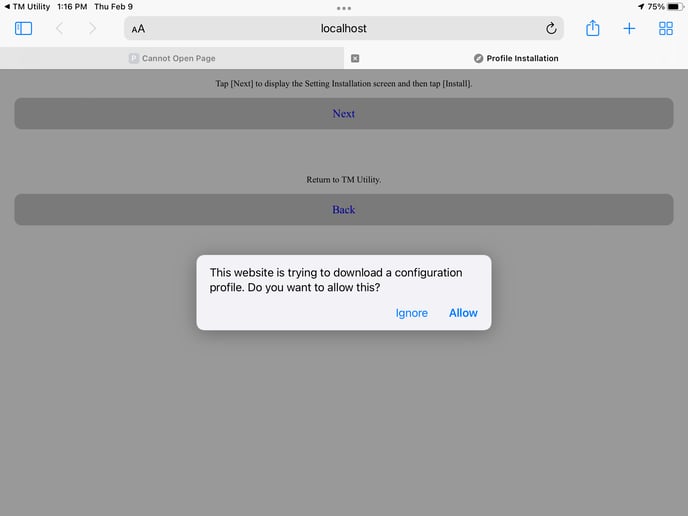
Note: if you do not see this screen, make sure you are connected to the EPSON_Printer WiFi network.
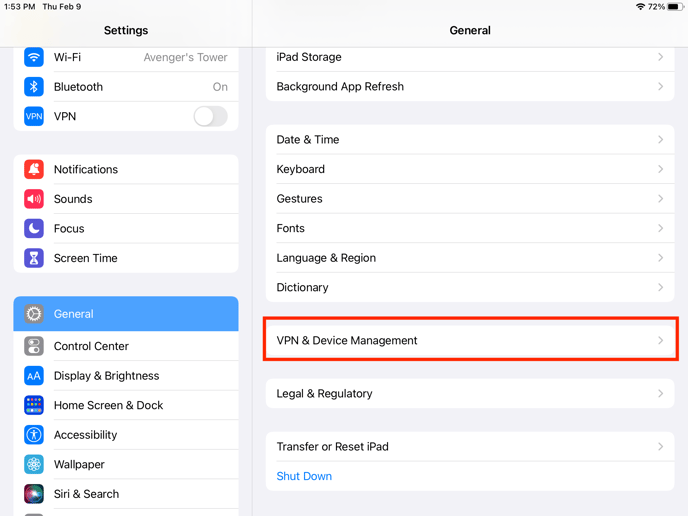
Tap Close, and exit your web browser. Go to your iPad's settings, and scroll down to General. Select VPN & Device Management.
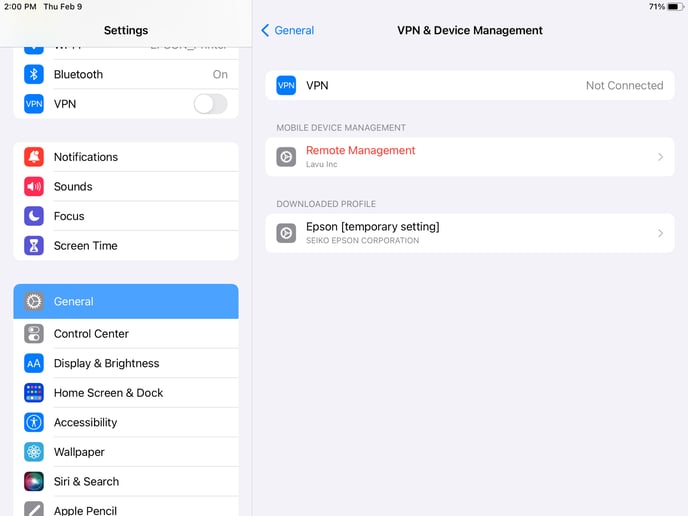
Tap Epson under Downloaded Profile, and click through the screens to install this temporary profile.
Once finished, navigate back to the Utility application. The app will automatically connect to the printer.
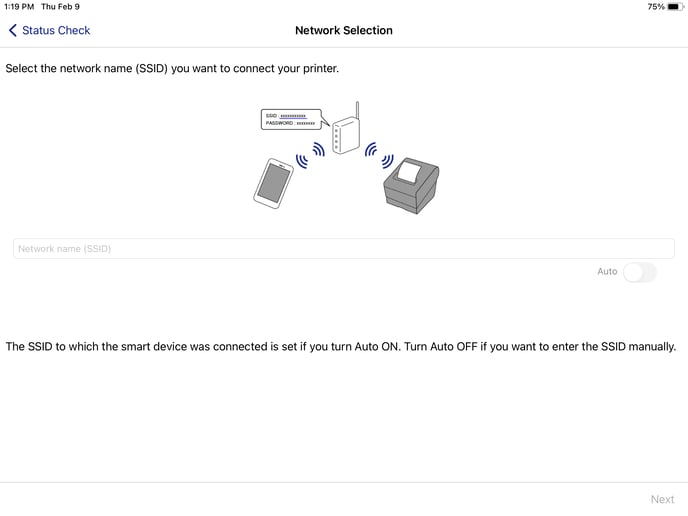
On the next screen, enter in the name of your WiFi network, and tap Next in the bottom right corner.
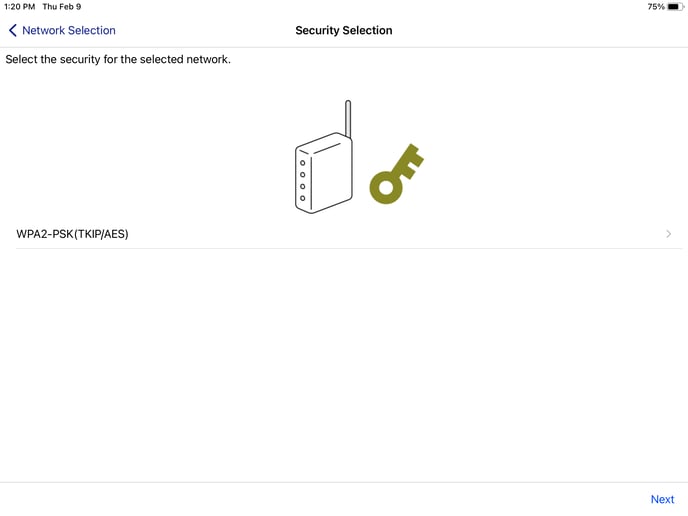
For security selection, select WPA2-PSK(AES), then tap Next.
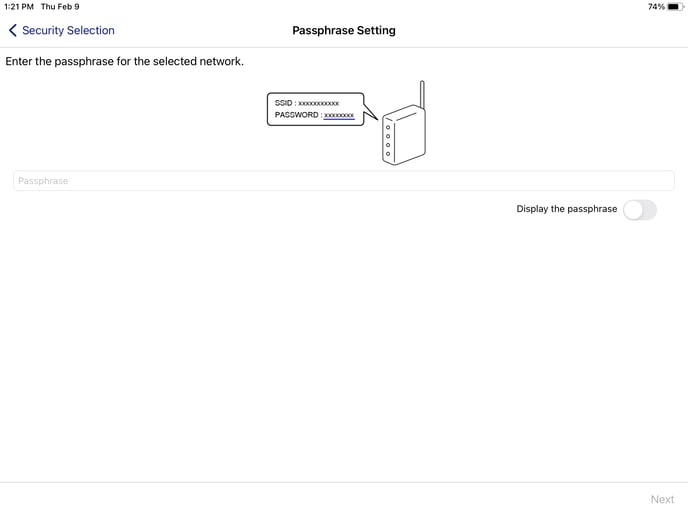
Enter in the password for your WiFi network and tap Next.
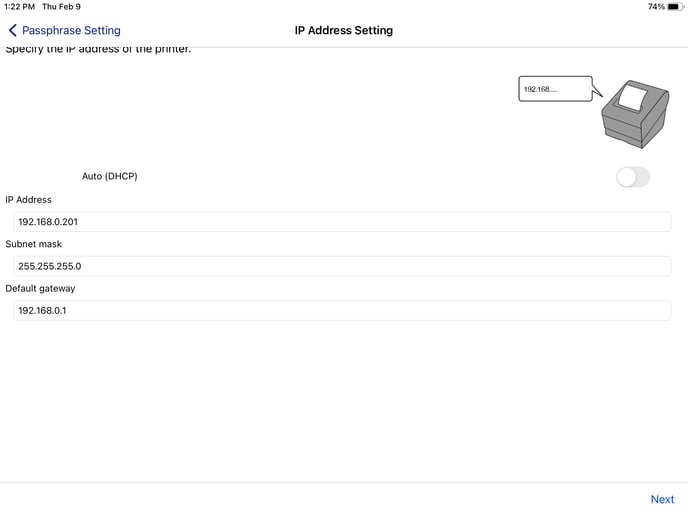
If you know your network's IP settings, you can disable Auto (DHCP), and enter in an IP address, subnet mask, and default gateway for your printer to use.
If you do not know this information, you can leave Auto (DHCP) enabled and tap Next.
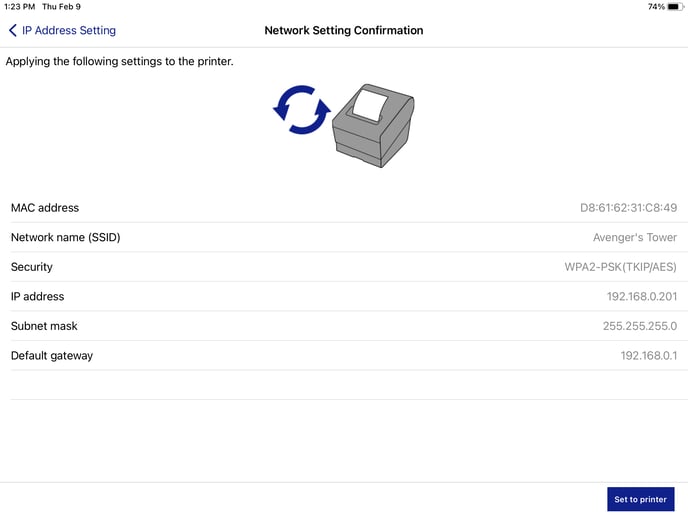
Tap Set to printer in the bottom right corner.
After you're brought to the next screen, exit the app and navigate back to your iPad's WiFi settings. You need to connect back to your restaurant's WiFi network.
Once that is done, come back to the application and tap Next.
Your printer will restart, and you will be prompted to conduct a test print.
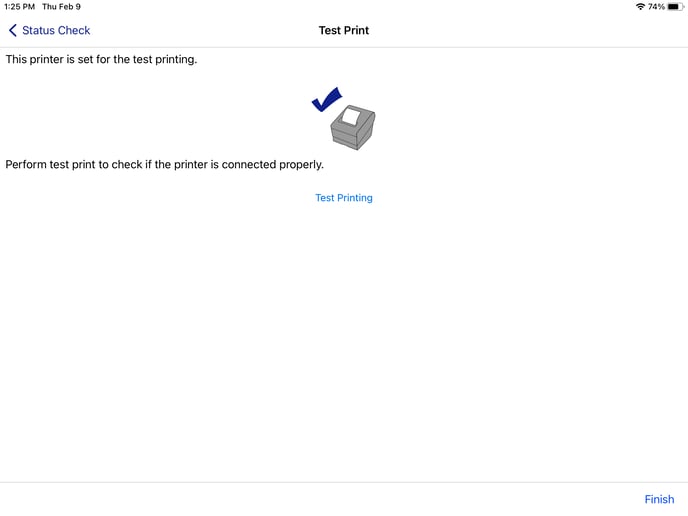
If your test print is successful, tap Finish, and the setup will be complete.
If your test print was not successful, make sure you are connected back to your restaurant's WiFi network and try again. If it is still unsuccessful, you will want to reset your printer and go through these steps again.
Set a Static IP Address
If you did not set a static IP address while using the Utility app, we highly recommend doing so using the steps in this article here.